Learn how to organize drawers for cheap using your Cricut and craft supplies you already have.
Believe it or not, you don’t need anything complicated for cheap drawer organizers made with your Cricut machine. The other day, I came home and decided I needed a simple drawer organizer box to help organize my craft stash and make my storage bin more functional.
This post may contain affiliate links, which means I’ll receive a commission if you purchase through my links, at no extra cost to you. Please read my full disclosure for more information.
I have an unnecessary amount of sequins, which I use to make shaker cake toppers. Don’t judge – they were on sale 😁
Straight to work I went to design a quick and cheap drawer organizer with Cricut Design Space. I grabbed white cardstock and a scoring tool, then powered up my Cricut machine. Within a few minutes, I had a box cut and lines scored. Gotta love that Cricut machine.
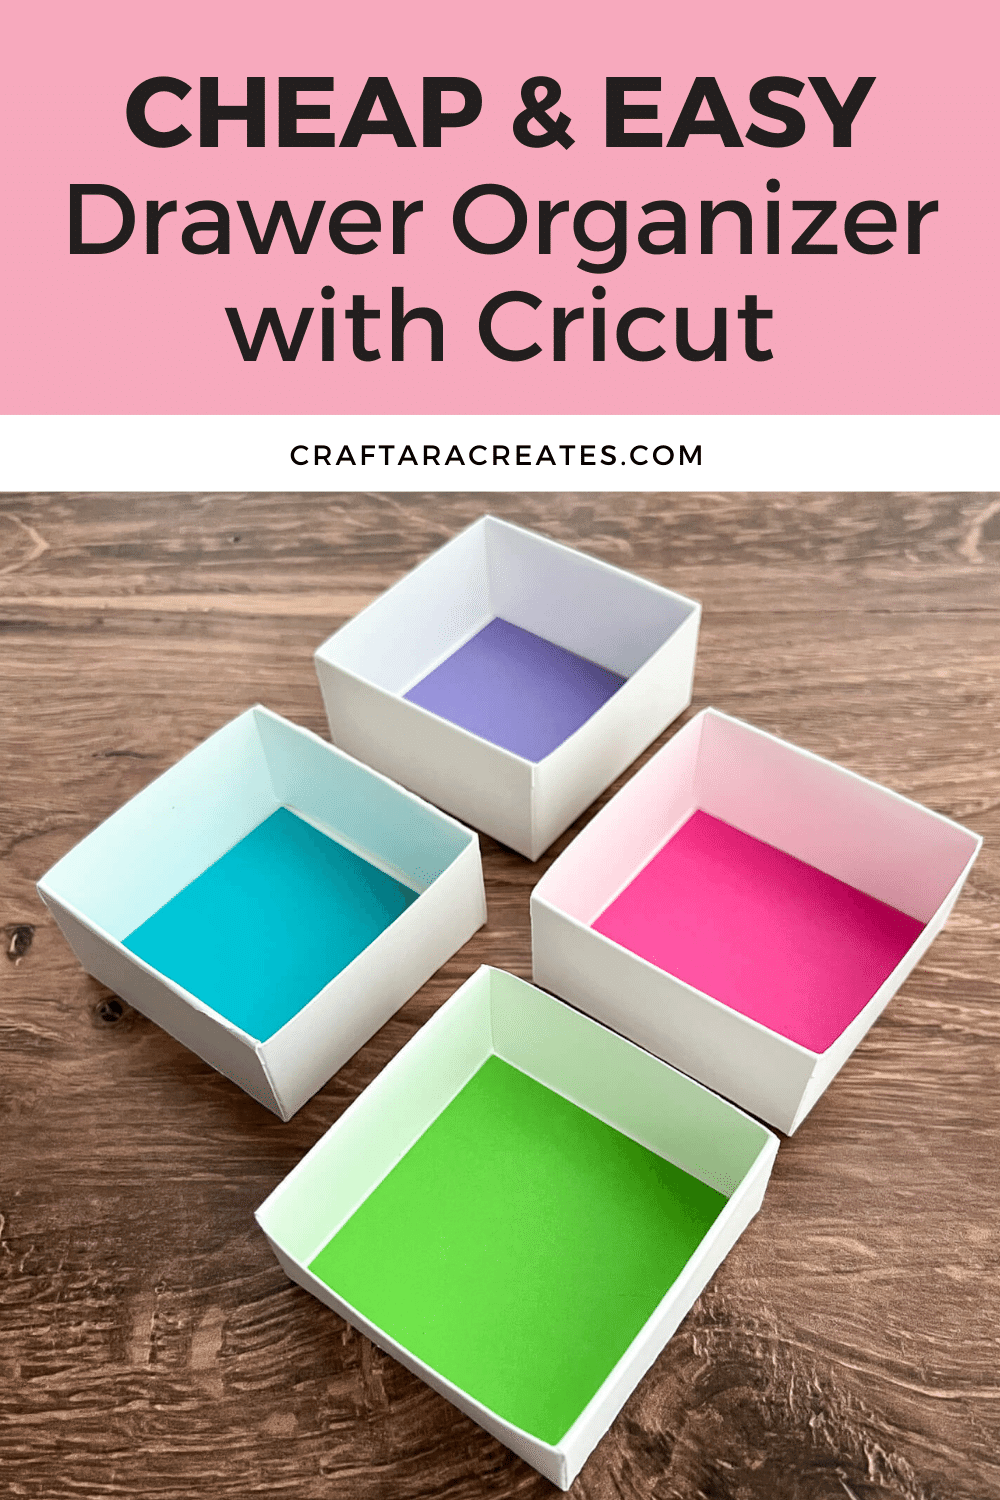
I cut the drawer organizer box with white cardstock but the box was a little boring.
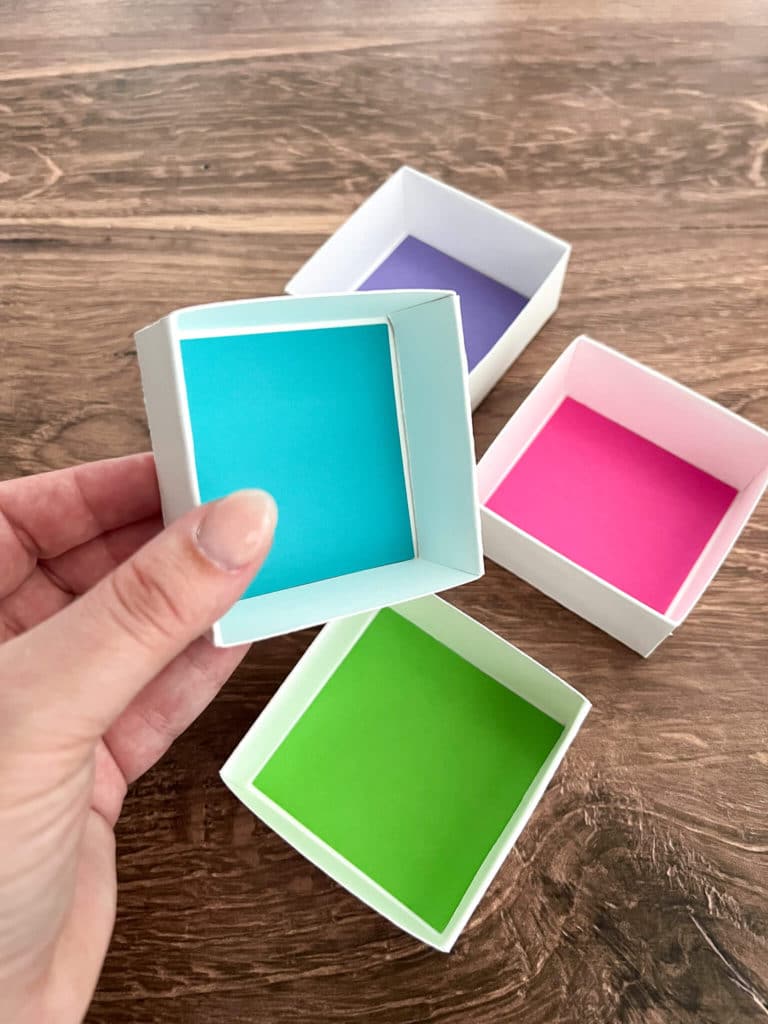
My scrap cardstock stash is overflowing and just screaming to be used for something. I grabbed a few colorful cardstock scraps to brighten up the cheap drawer organizer made with Cricut.
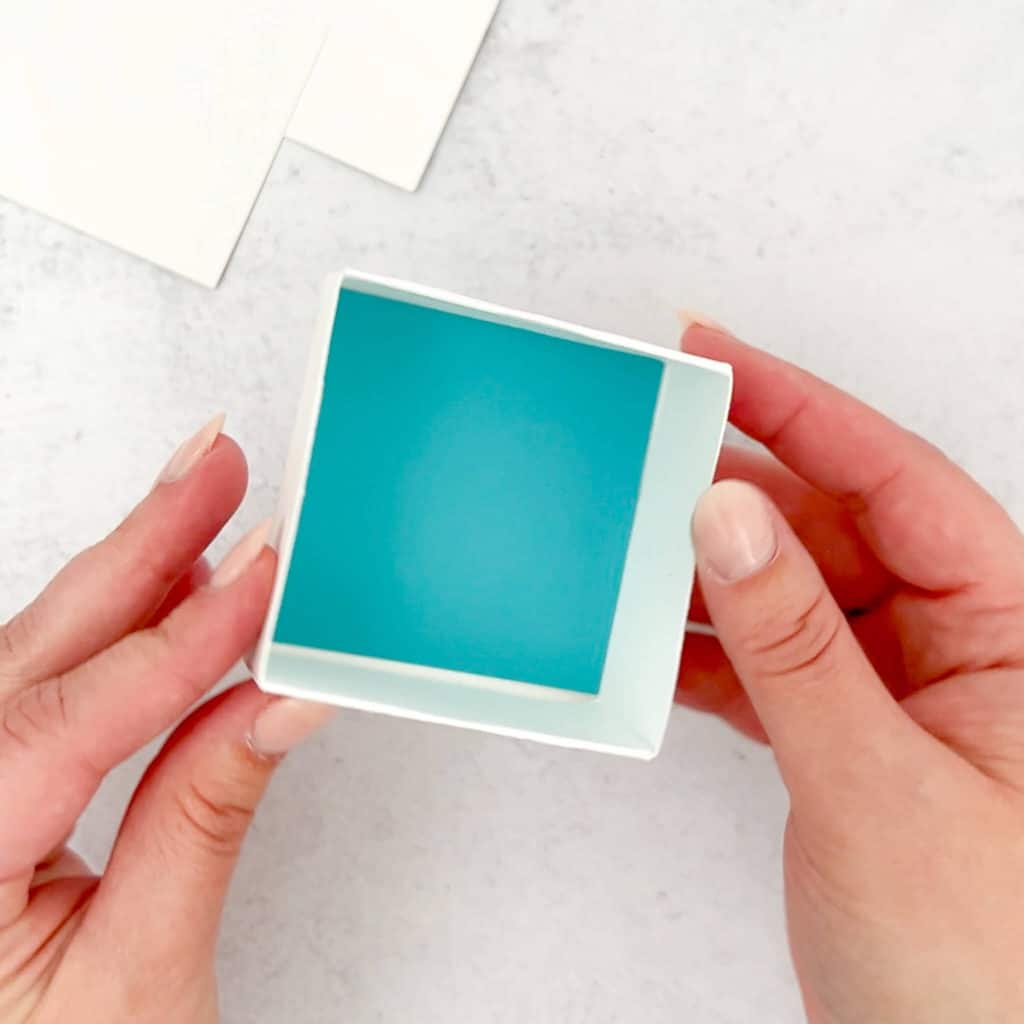
After adding a colorful cardstock square to the bottom of the cheap drawer organizer, the box was complete.
Do you love this tutorial? Never miss another one.
Let’s be craft besties and stay in touch. Join the Craftara family to gain access to my resource library full of free SVG cut files compatible with Cricut. Sign up below to unlock the resource library and never miss any of my tutorials.
You will be included in my email newsletter with helpful Cricut ideas, tips and resources. Unsubscribe anytime and your email will never be shared.
How do I make cheap drawer organizers with Cricut?
Lucky for you, Cricut design space has a project share feature. And since I created this cheap drawer organizer with Cricut using free shapes and lines, you can check out the pre-made project.
Here is the link to the drawer organizer box project in Cricut design space:
What do I need to make cheap drawer organizers with Cricut?
If you have a Cricut with a scoring tool, cardstock and glue. That is all you need.
Here are the tools and materials I used:
- Cricut Maker 3
- Scoring wheel (or a scoring stylus)
- Craft glue with a precision tip
- Cardstock
- Paper bone folder (optional)
- Brayer (optional)
Find the project in Cricut Design Space
Click on the cheap drawer organizer with Cricut project link -> HERE to open this project in Cricut Design Space.
Click customize if you want to open the project in Cricut Design space.
You will find the project is ready to go in Cricut design with all the score and cut lines you need. The design is grouped together and you can adjust the size if needed.
Once you are ready, click the make it button to send the project to your Cricut machine
How to cut cardstock for a drawer organizer
At the set material screen, choose the type of cardstock you have. I choose the medium cardstock setting.
Grab a Cricut mat and add your cardstock to the mat. I used a brayer to make sure the cardstock was attached well to the mat.
The first cut I did is for an insert for the bottom of the drawer organizer box. I like to use my scrap cardstock to add fun colors to these little boxes.
Unload the mat when the cut is finished and add the cardstock for the next.
Load the mat into your Cricut machine. The second cut I did is for the box and I need to add a scoring tool to make the score lines so I know how to assemble the box.
With the Maker, you can use a scoring wheel or a scoring stylus. For the Explore Air machines, use a scoring stylus.
Switch out the blade if using the scoring wheel and continue with the cut. Your Cricut machine will make all the score lines and pause for you to change out the blade if using the scoring wheel.
Unload the mat when the cut is complete. Next we will assemble the box.
How to assemble your cheap drawer organizer
Once the project is cut out, follow the steps below to assemble your cheap drawer organizer box.
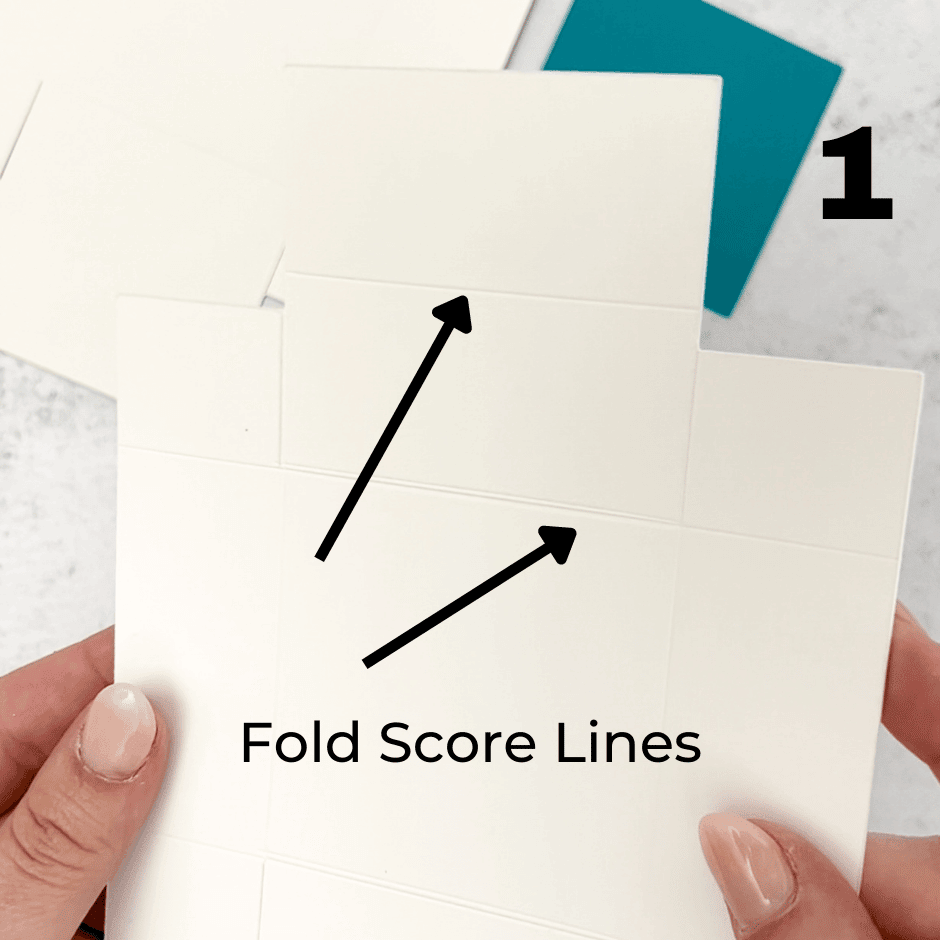
Step 1: Fold all the score lines. One side of a score line has an indent and the other side is raised. Fold a scored line so that the indented scored part is on the outside of the fold. Another way to say that is to fold into the raised side of the score line.
Another helpful tool when making paper crafts with cricut is a paper bone folder. This tool helps get perfectly crisp creases.
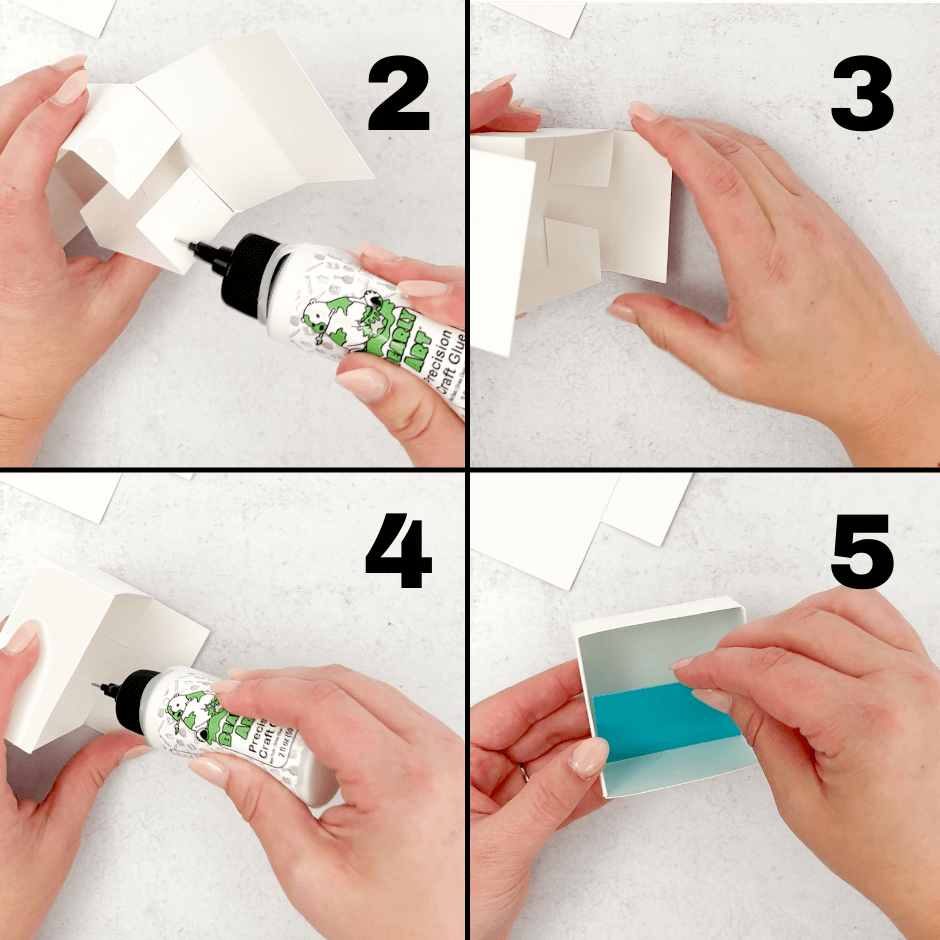
Step 2: Next, grab your paper glue and add glue to the small tabs on opposite sides of the box.
Step 3: Glue the tabs to the perpendicular side.
Step 4: Once the tabs on all sides are glued to the perpendicular side, fold the long side over the box edge and add glue to ensure the box is secure. Repeat on the other side.
Step 5: Once the box is done, add the square inset to the bottom of the box. You can glue the insert in or simply lay the insert inside the box.
I love adding color bottom inserts to my boxes. It makes me smile everytime I see these cute boxes.
WAS THIS HELPFUL?
Did you find this information on how to make a cheap drawer organizer with Cricut helpful? If so, please pin this idea and let me know your thoughts in the comments below.
