


Did you get a new Cricut machine this holiday season? Congrats! Learn how to make DIY gift tags from holiday cards with your new Cricut cutting machine.
Use Cricut as an easy and quick way to reuse those holiday cards before they land in the garbage can. Upcycle a few cards as gift tags using Cricut’s SnapMat feature to cut perfect gift tags.
The Cricut Design Space SnapMat feature is only available in the mobile app because it uses your phone to take a photo of the cutting mat. Once you take a photo of the mat, you can perfectly position your cuts over the part of the material you want to cut. The Cricut SnapMat feature is a great way to use up small scrap pieces of vinyl or make gift tags out of holiday cards.
In this tutorial, I show you how to use the SnapMat feature in Cricut design space to DIY next years Christmas gift tags out of this seasons holiday cards.
This post may contain affiliate links, which means I’ll receive a commission if you purchase through my links, at no extra cost to you. Please read my full disclosure for more information.
SUPPLIES
- Cricut Cutting Machine (Explorer or Maker)
- Cricut Mat
- Festive string or twine
- Old holiday cards
DIRECTIONS
Prepare the cards by cutting off the area that is perfect for a gift tag – most often the front.
Place the card fronts in the four corners of the Cricut mat.
Using Cricut Design Space from your mobile phone, search images for gift tag and select a basic shape. Duplicate the shapes for as many as you need. Ensure all the shapes are the same color to cut them on one mat.
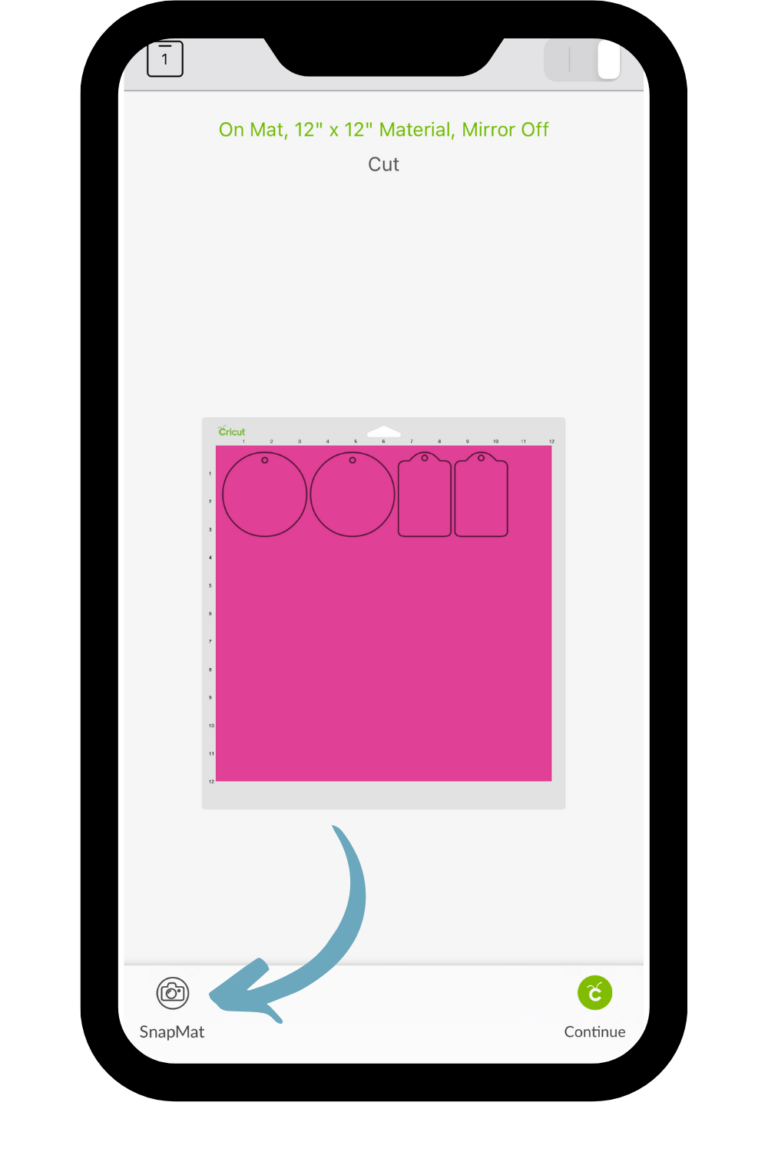
- Select Make It to bring up the SnapMat screen.
- Tip for using Cricut Design Space SnapMat
Before you select make it, switch over to the bluetooth settings in your phone and check to be sure the Cricut machine is connected. Otherwise, you may get a ‘no device found’ error in Cricut Design Space when the phone is not able to communicate with the Cricut machine.
- Select SnapMat and follow the onscreen guides to line up your mat. I suggest laying your mat on the floor to achieve an easy parallel angle.
Tip for using Cricut Design Space SnapMat
Have you ever became frustrated with the Cricut Design Space SnapMat photo taking function?
When you click the SnapMat button and Design Space struggles to take the photo, try a different background. I have noticed that if the contrast between the mat color and the background makes a big difference. When I lay the mat on a dark background, the SnapMat feature works successfully ever time.
Adjust the shapes around the mat over the areas of the cards that you want to cut.
Select a material setting. I used medium cardstock.
- Feed the mat with your card fronts into the Cricut and start the cut.
- With the cut complete, remove the tags off the mat. Add string
Further embellish your upcycled gift tags with bows, ribbon, glitter, washi tape or anything you have laying round the craft room.
You will be included in my email newsletter with helpful Cricut ideas, tips and resources. Unsubscribe anytime and your email will never be shared.
WAS THIS TUTORIAL HELPFUL?
Did you find this tutorial on how to make DIY gift tags from holiday cards helpful? If yes, please pin this idea and let me know your thoughts in the comments below!

2 Comments
If you already have an assortment of tags on your Cricut Design Space, do you have to have the monthly pay Cricut Access to use the Snap Map feature?
Hi Barbara, I believe SnapMat is available for free through the iOS mobile app (Apple iphone or ipad). However, the gift tag designs may be part of the Cricut Access subscription.