


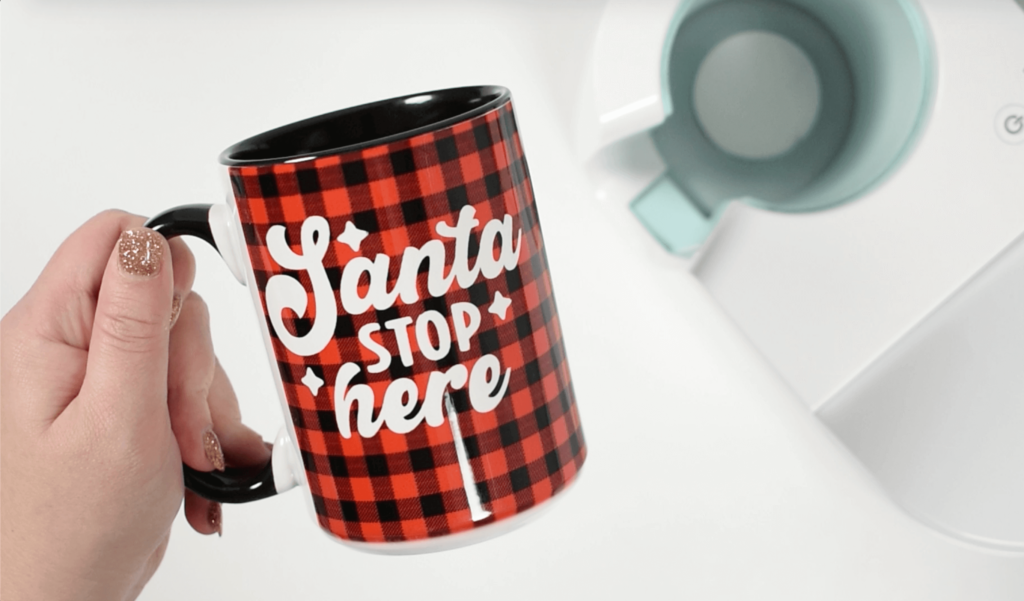
Make your Christmas Eve even more festive with a mug for Santa using the Cricut Mug Press
Along with a special plate of cookies, Santa should have the opportunity to enjoy a beverage in a mug dedicated just for him on Christmas Eve. Use the Cricut mug press to make a DIY Santa mug that will last a lifetime. Mugs created with the Cricut Mug Press are dishwasher and microwave safe.

This post may contain affiliate links, which means I’ll receive a commission if you purchase through my links, at no extra cost to you. Please read my full disclosure for more information.
Table of Contents
MUG BLANKS FOR THE CRICUT MUG PRESS
I will show you how to make the DIY Santa mug and how easy it is to use the Cricut mug press. Before we get started, lets chat about mug blanks. Mug blanks are just that – blank mugs. However, for use with the Cricut mug press, sublimation mug blanks are required. These types of mug blanks can be found in Cricut’s shop or even on Amazon.
The difference between a sublimation mug and a regular mug is that the sublimation mugs are prepared with a Polymer coating that reacts when heat is applied to transfer the ink into the mug for permanent results. Sublimation is defined as the transition of ink into a gas through high temperature heat and pressure to permanently dye the substrate (substrate = mug blank).
For the DIY Santa mug, I used a non-cricut mug with a black handle from Amazon. These 15 oz mugs are huge and are sized well for dipping cookies into milk. To create this festive look, I combined the black handle mug with buffalo check infusible ink.
WHERE CAN I FIND THIS CUT FILE?
The Santa Stop Here – free SVG cut file is in my resource library. Sign up here to unlock the resource library and grab the free SVG cut file. You will find this in the Christmas Craft section of the resource library.
You will be included in my email newsletter with helpful Cricut ideas, tips and resources. Unsubscribe anytime and your email will never be shared.
HERE'S WHAT YOU'LL NEED TO MAKE DIY SANTA MUG WITH CRICUT
- Cricut machine (Joy, Explore Air or Maker)
- Cricut Mat – StandardGrip Machine Mat
- Cricut Mug Press
- Infusible Ink Transfer Sheet
- Mug Blank with black inside/handle (rated for sublimation)
- Heat Resistant Tape
- Lint Roller
HOW TO MAKE A DIY SANTA MUG USING THE CRICUT MUG PRESS
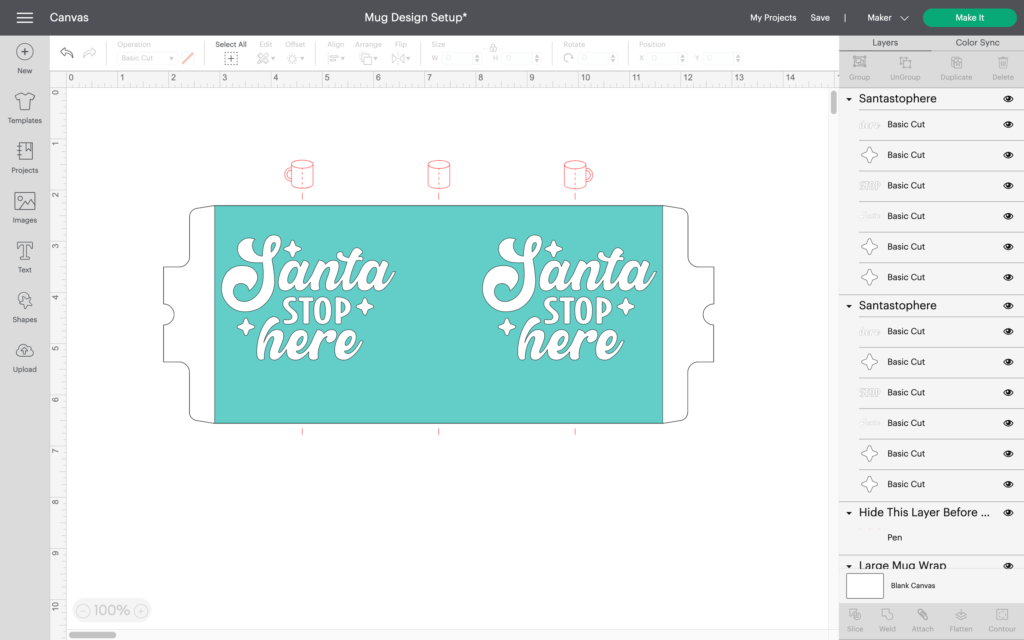
In Cricut Design Space, open a new canvas. If you are a Cricut Access member, search projects for ‘Mug Design Setup’ to find the template with multiple size/edge options to choose from to take the guesswork out of setting up your mug design. I choose the straight edge. Select the size for the mug you are using 12 or 15 oz size. Even though the mug I used is not a Cricut brand mug, the 15 oz design fit well.
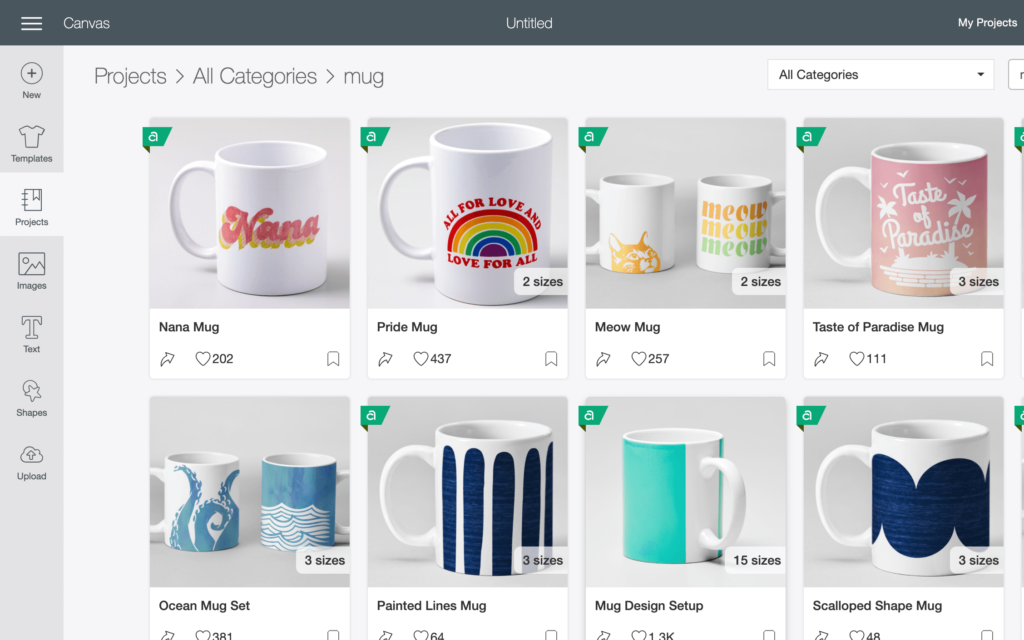
Without a Cricut Access subscription you can still easily find templates in both 12 and 15 oz size. Within images, search for ‘mug’ to find basic mug wrap templates that you can customize and the placement guides to help line up your mug designs.
Next, upload the Santa Stop Here free SVG cut file into Cricut Design Space and adjust the size as needed. For the big 15 oz mug, I sized the cut file at 3.4 inches wide. Check to be sure the mug design template is not grouped together. If so, select the template and ungroup.
Add the design to both sides of the mug template and use the pen layer as a guide to center the design.
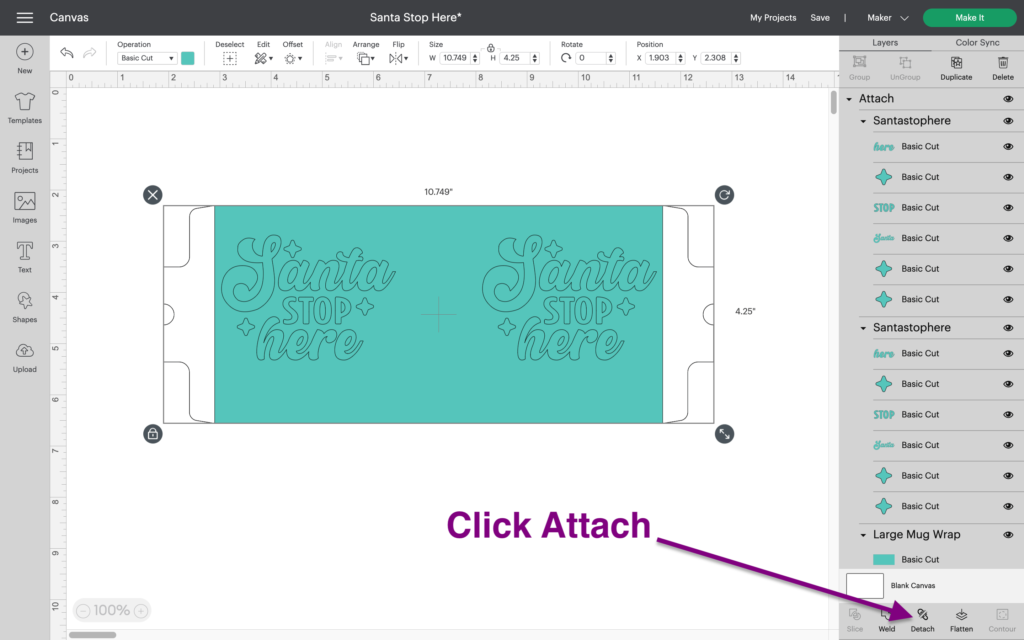
Once you are happy with the placement of the design, select the middle rectangle and the designs, then click attach. This will attach the design to the mug press template.
Then select all and click attach. This will attach the design to the mug wrap template. Now your project is ready to send to the Cricut machine for cutting.
CUT INFUSIBLE INK TO MAKE A DIY SANTA MUG USING THE CRICUT MUG PRESS
Once you click Make It to send to Cricut, be sure to mirror the design much like iron-on vinyl.
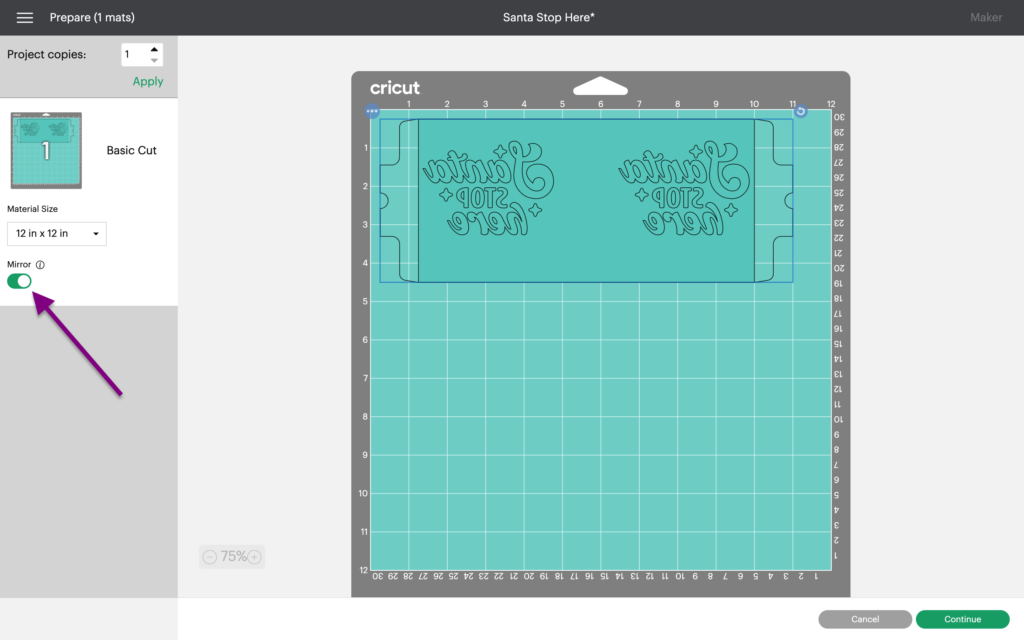
Select Infusible ink transfer sheet as the material. With all infusible ink, I use more pressure and will repeat the cut after the first cut completes. If using a Cricut Explore machine, turn the Smart Set Dial to Custom first.
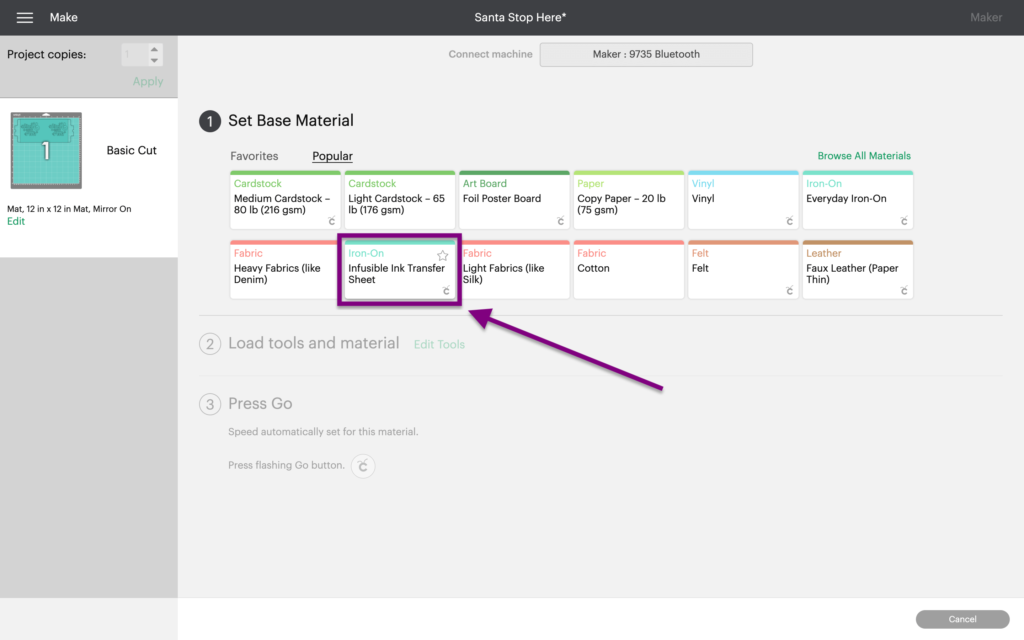
Place Infusible Ink Transfer Sheet onto a StandardGrip mat, ink side up.
Using the standard fine point blade that comes with all Cricut cutting machines, load the mat with Infusible ink into the machine, then press the flashing Go button.
Once the cuts are complete, remove the Infusible Ink transfer sheet from the mat. By using the Cricut Design Space mug template, the liner should cut clear from the remaining Infusible Ink transfer sheet but if it doesn’t use scissors to trim excess Infusible Ink.
Roll the cut design so the cut lines separate and are more visible. “Cracking” the cut infusible ink this way makes it easier to remove excess material from in and around your design. Use your fingers or tweezers to carefully remove negative pieces from in and around your design, leaving the design on liner. The text will be backwards which is correct for applying Infusible Ink with the Cricut Mug Press.
APPLYING INFUSIBLE INK WITH THE CRICUT MUG PRESS
Prepare the mug for the Cricut Mug Press by cleaning it with a new lint roller to remove any dust or dirt. Wrap the infusible ink transfer sheet with the ink side against the mug. I found it easiest to apply the infusible ink sheet while the mug is upside down because I use the table top to help line up the transfer sheet with the top of the mug. Secure the Infusible ink transfer sheet with heat resistant tape.
Pre-heat the Cricut Mug Press and once ready, place the mug in the press and close. The mug press usually takes 6 minutes to press a mug. Wait for the beep and to remove the mug. The mug will be very hot. Only touch the mug handle and place on a heat resistant surface like an EasyPress mat.
Wait for the mug to cool down to avoid burns. Let the mug sit for 15-20 mins or longer if still warm.
When the mug is cooled, remove the tape and transfer sheet to reveal your masterpiece.
SANTA STOP HERE SIGN WITH CRICUT
Another way to use this free cut file is to create a Santa Stop Here sign. I created this sign to hang near our Christmas stockings. The cut file was cut out of removable vinyl and used as a stencil to add liquid chalk to the chalkboard sign.
You can see a quick video of this project on my Instagram profile.

WAS THIS TUTORIAL HELPFUL?
Did you find this simple project tutorial on how to create a DIY Santa mug using the Cricut Mug Press helpful? If so, please pin this idea and let me know your thoughts in the comments below.