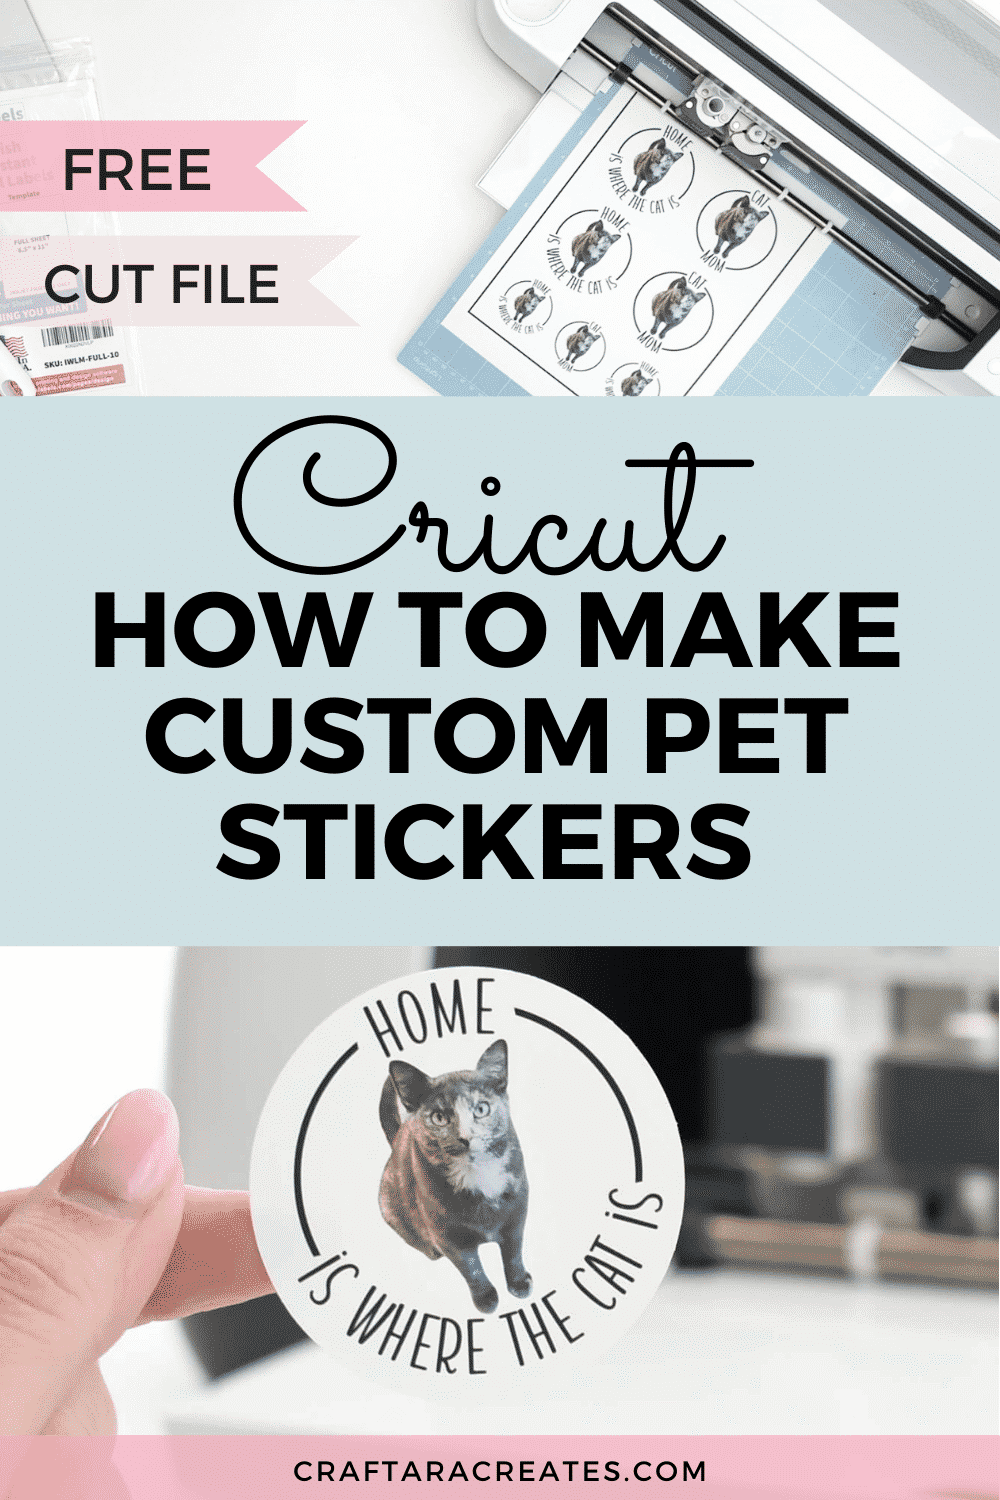
Learn how to make custom stickers of your dog or cat
You can make custom stickers of your dog, cat or any pet at home using a Cricut machine and a home printer. I created these easy custom pet stickers with a photo of a cat and you can too.
For this project, I created a free SVG template that you can use in Cricut Design Space to make this project super simple. Using the template you can upload the pet photo and add it to the sticker template. I will walk you through making custom stickers of your cat or dog in the video below. This project works best with the Cricut Explore Air 2/3 or Cricut Maker 3 machines.
Where can I find the pet sticker template file?
Grab this free custom pet sticker cut file template from my resource library in the Home & Organization craft freebie section and upload the SVG cut file into Cricut Design Space. Sign up below to unlock the resource library.
Table of Contents
Here’s what you’ll need to make custom stickers of your dog or cat
- Cricut
- Cricut machine mat – Blue Lightgrip mat
- Brayer
- Sticker paper
- Inkjet printer
- Pet sticker template
- Pet photo
How to make custom stickers of your dog or cat
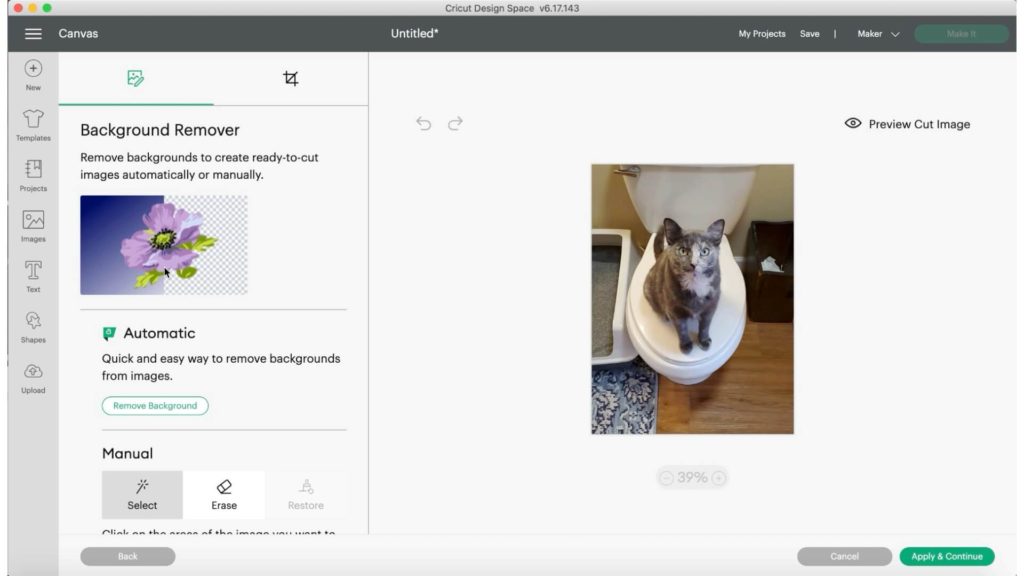
Start your custom stickers of your pet by uploading a digital photo of your pet into Cricut Design Space. This can be a photo taken with your phone. For me, I noticed the image was a bit dark so I lightened up the photo a little beforehand.
Use the Cricut Design Space Automatic background remover to get rid of the background. The automatic background remover is a feature for Cricut Access subscribers. Click the Remove Background button and design space will do most of the work for you.
If you do not have a Cricut access subscription, you can remove the background of an image before uploading to Cricut design space. A free tool I’ve used before is the site remove.bg.
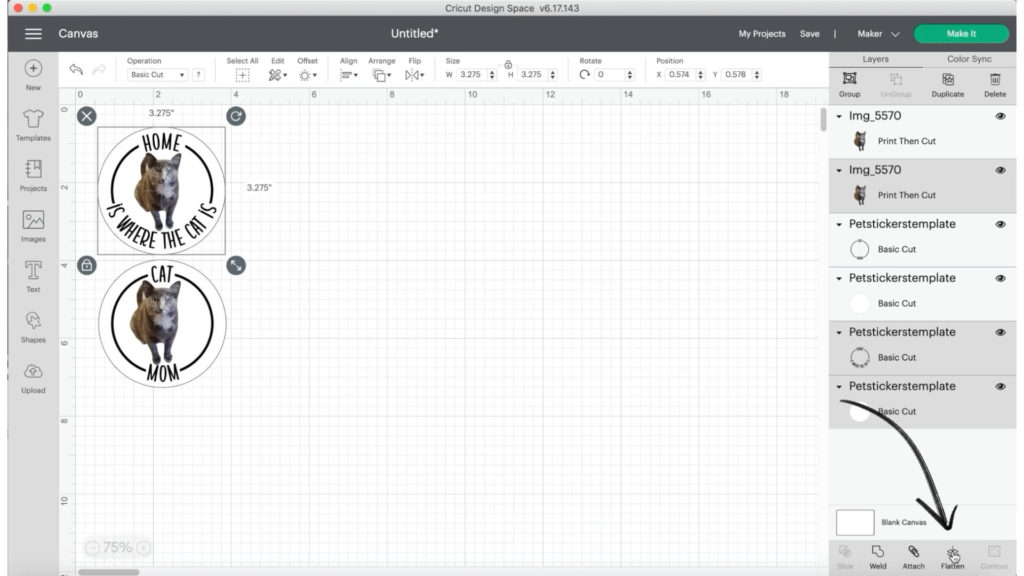
Next upload the pet sticker template SVG file into Cricut design space. These sticker templates are SVG’s so you can adjust the size and color easily. Resize the pet image to fit in the sticker template. Duplicate the pet images as needed to fill the sticker templates.
How to create a sticker in Cricut Design Space
To take the design from separate layers to a sticker is done by using Flatten. Select one of the stickers and all of its layers – then click on Flatten. This is the key to creating stickers. Correctly flattening all layers will merge all the selected layers down to one printable image. Repeat the steps on the remaining stickers. Once all the stickers are flattened, you will see that all the layers say Print Then Cut.
How to max out the Print then Cut size limit for making stickers in Cricut Design Space?
Currently, the Cricut Design Space Print Then Cut size limit is 9.25″ x 6.75″ (* Cricut updated the print then cut size since this post was written) . The trick to maxing out the size limit is to use a template to arrange the stickers before sending the project to the Cricut machine.
Select shapes and click on a square. Resize the rectangle to the current Print Then Cut size limit. At the moment, that is 9.25″ x 6.75″. Arrange the stickers on the rectangle template. Duplicate the stickers and fill up the rectangle with as many stickers as you can fit. Once the rectangle is filled and all the stickers are arranged the way you want, locate the layer with the rectangle and click the eyeball to hide this layer. Then click select All and click on Attach. Attach will hold the stickers in the same position on the cutting mat as in the Canvas.
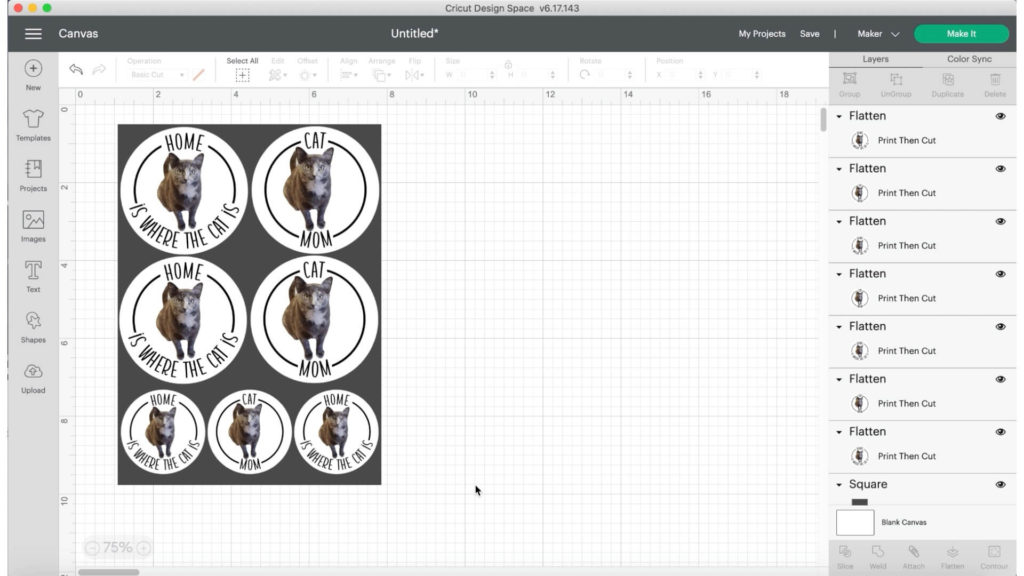
How to use print then cut in Cricut Design Space?
With all the stickers arranged well, click make it to send the stickers to your Cricut machine. You will see all your stickers perfectly arranged on one sheet of paper. The black outline is the cut sensor marking used by the Cricut machine.
On the Make screen, select send to printer. The printer you use for Print Then Cut must be directly connected or wirelessly connected to the device you are using Cricut Design Space on.
On the Print Setup screen, toggle the “add bleed” to off and toggle the “Use System Dialog” to on. Then click Print. The System Dialog box may get stuck behind the Design Space Screen. Move the screen down to look for the printer dialog box.
On the printer dialog box, select the best options for your printer. I adjusted the feed tray, set the media type to Photo and choose “best” for the quality. Select Print when you are ready. Make sure the sticker paper is already loaded in the printer.
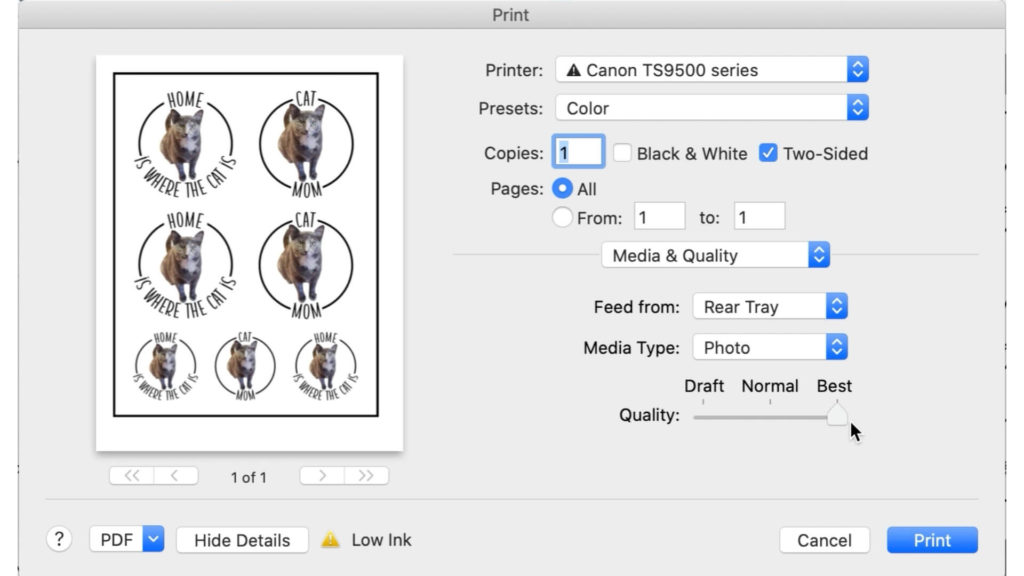
Once the print is completed, set the material in Cricut Design Space so the Cricut machine knows how to cut out the stickers. For the sticker paper I used, I choose vinyl with More pressure as the cut setting.
Add the printed sticker sheet onto a Lightgrip Machine mat and load the mat into the machine.
You will see that the Cricut machine will scan the cut sensor marking which is the black outline around your stickers. The Cricut machine will use the marking as a guide to know where to cut.
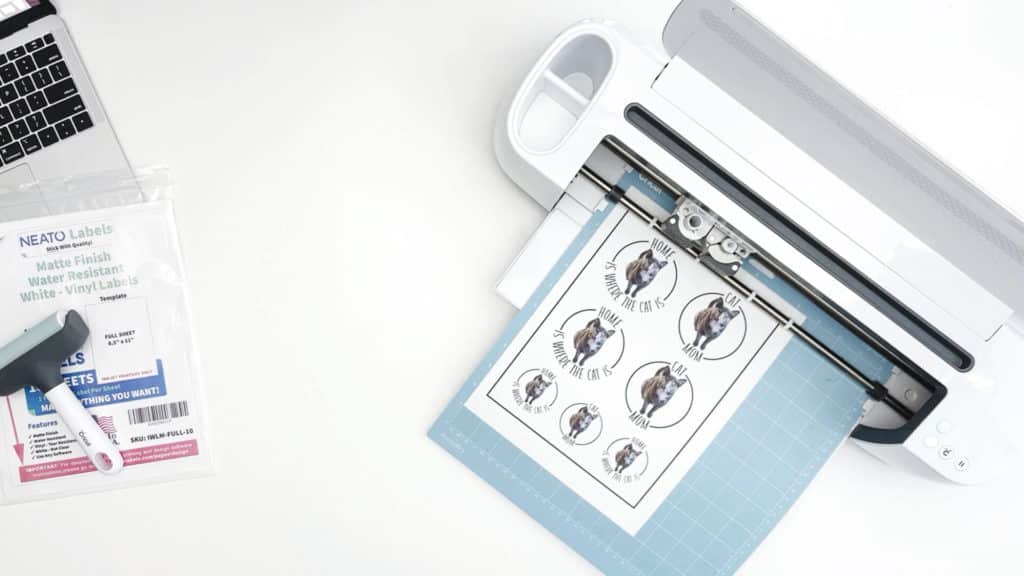
What sticker paper works with Print Then Cut to make custom stickers of your dog or cat?
The sticker sheet I used is a matte finish vinyl label sheet from Neato Labels. These work with inkjet printers and easily feed through my printer.
The tricky part about sticker paper is the cut setting because sticker paper varies a lot. I want my stickers to be “kiss cut” so they stay on the backing sheet with all the other stickers. I did a couple of test cuts before this and found that the vinyl setting with more pressure worked on these sheets.
Unload the mat once the cuts are complete and use a paper trimmer to trim off the cut sensor marking outline.
I hope you enjoyed this simple tutorial on how to create custom stickers of your pet using your Cricut machine. Leave a comment and let me know what you think.
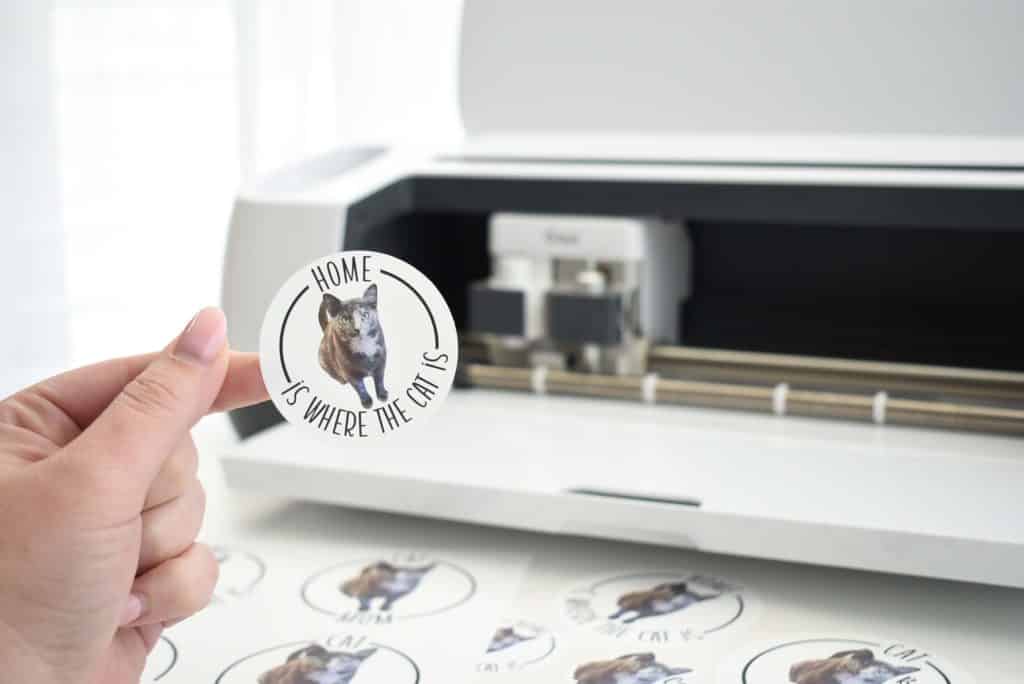
Was this tutorial to make custom stickers of your dog or cat helpful?
Did you find this Cricut tutorial on how to make custom stickers of your dog or cat helpful? If so, please pin this idea and let me know your thoughts in the comments below.





2 Comments
This is such a great idea and excellent tutorial! Thank you so much for sharing. I’ve been going crazy with making these stickers for friends and family!
That’s Amazing Debby! I’m so glad you are having fun making stickers.