


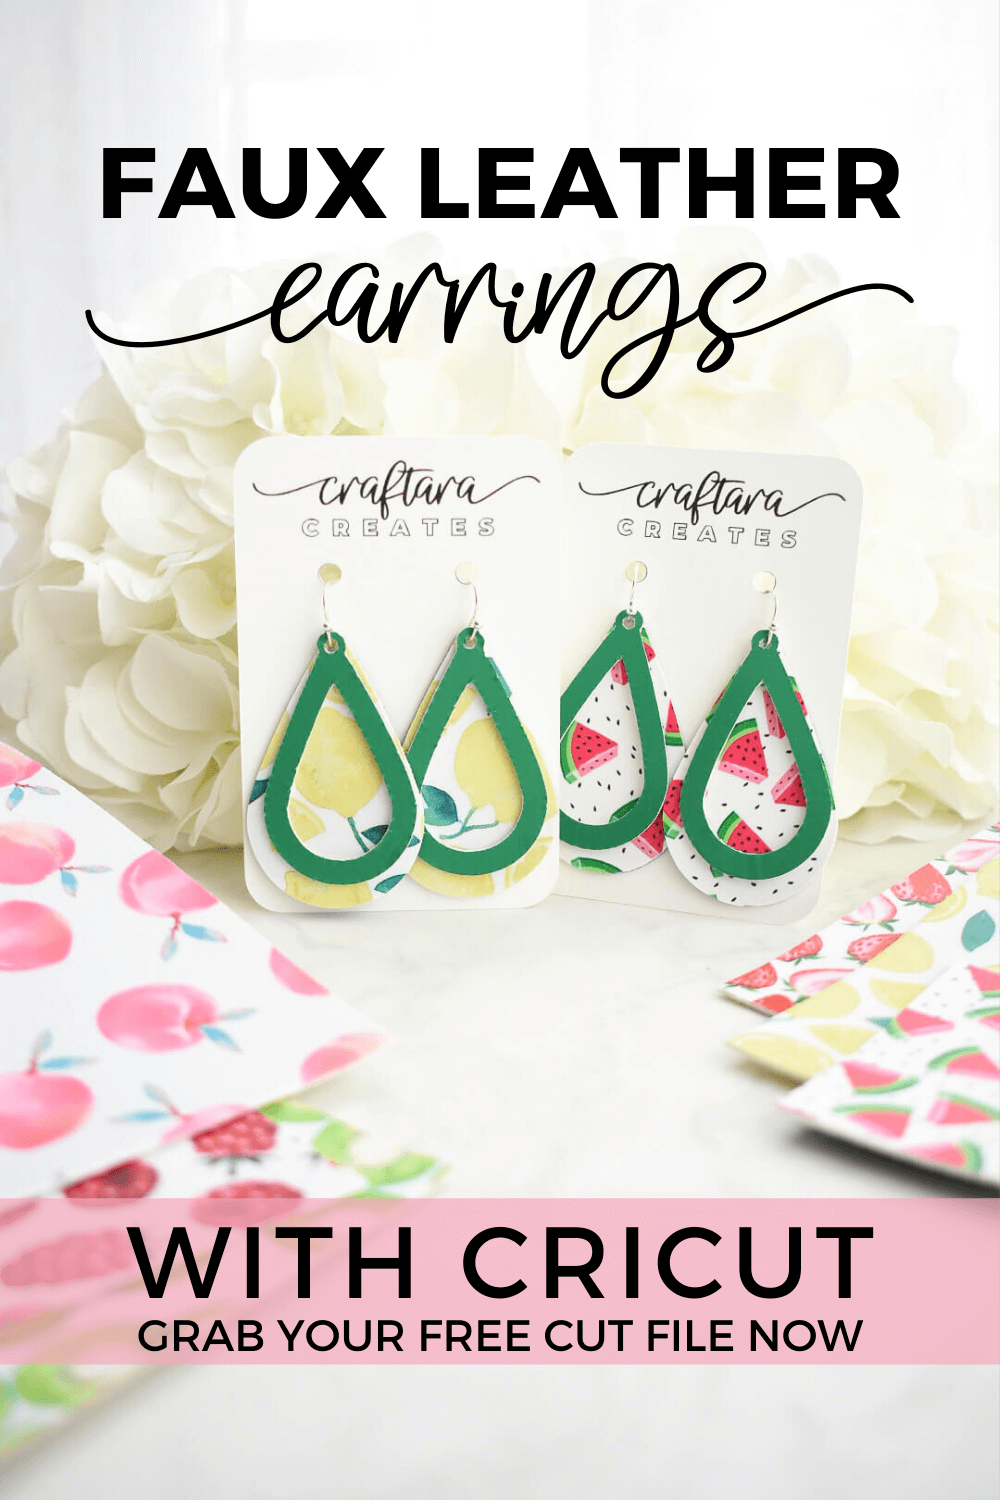
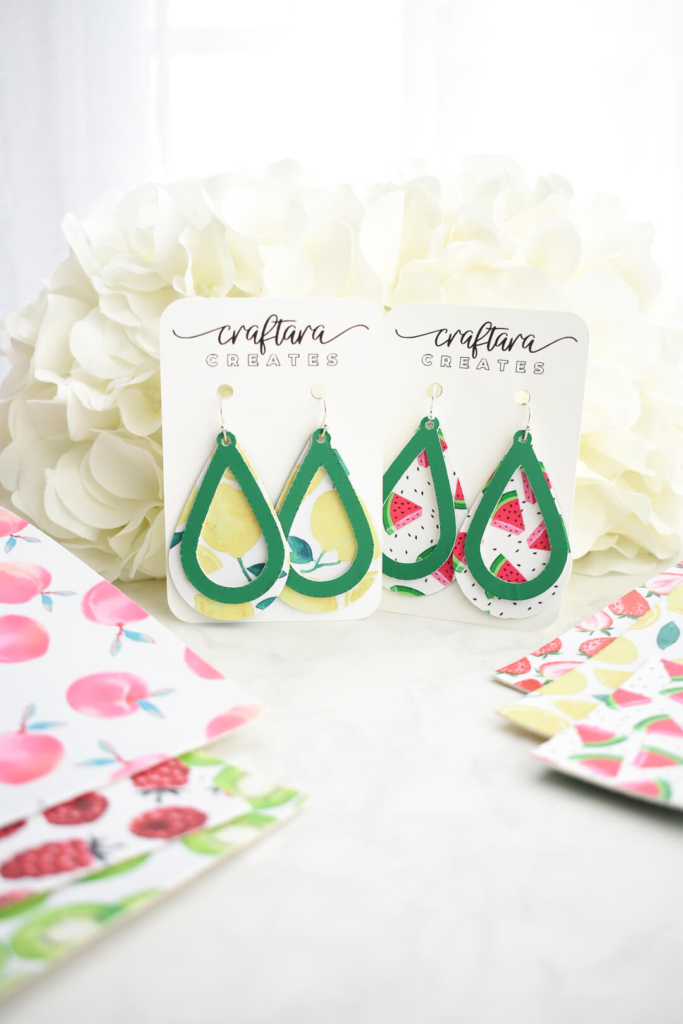
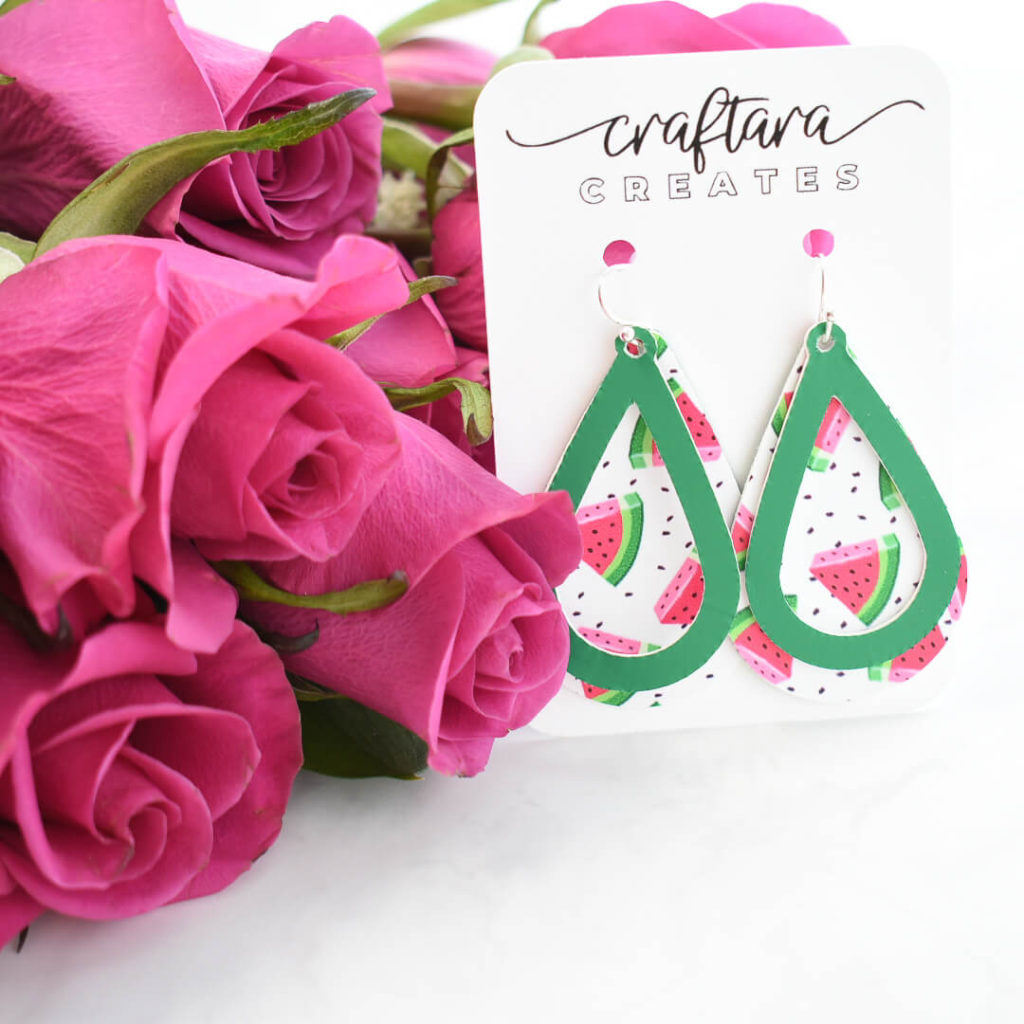
The possibilities seem endless for faux leather earrings with Cricut. So many different shapes, styles and patterns. Faux leather is the perfect lightweight material to use for jewelry making with your Cricut machine. Cricut Design Space has a few earring shapes as part of Cricut Access. However, if you’d like to try out faux leather earrings without the Cricut Access subscription, I created a free cut file just for you.
WHERE CAN I FIND THIS DESIGN?
Let’s be craft besties and stay in touch! Join the Craftara family to gain access to my resource library full of free SVG cut files compatible with Cricut. Sign up below to unlock the resource library and learn about all my new tutorials.
HERE’S WHAT YOU’LL NEED TO MAKE FAUX LEATHER EARRINGS WITH CRICUT
- Cricut maker, Cricut Explorer Air 2 or Cricut Joy
- Cricut StrongGrip mat or a very sticky green mat
- Transfer tape
- Faux Leather
- Cricut EasyPress or Cricut EasyPress Mini
- Cricut EasyPress Mat
- Iron-on Vinyl
- Earring hooks
- Jewelry tools or small needle nose pliers
- Free Layered Earring Cut file
- Painter’s tape
- Scissors or a rotary cutter to trim materials
Optional but helpful:
- Heat resistant tape or used piece of sticky iron-on vinyl transfer sheet

FAUX LEATHER EARRINGS CUT FILE SVG FOR CRICUT
Grab this free layered earring cut file from my resource library in the accessories section and upload the SVG into Cricut Design Space. Sign up above to unlock the resource library.
VIDEO INSTRUCTIONS TO MAKE FAUX LEATHER EARRINGS WITH CRICUT
INSTRUCTIONS TO MAKE FAUX LEATHER EARRINGS WITH CRICUT
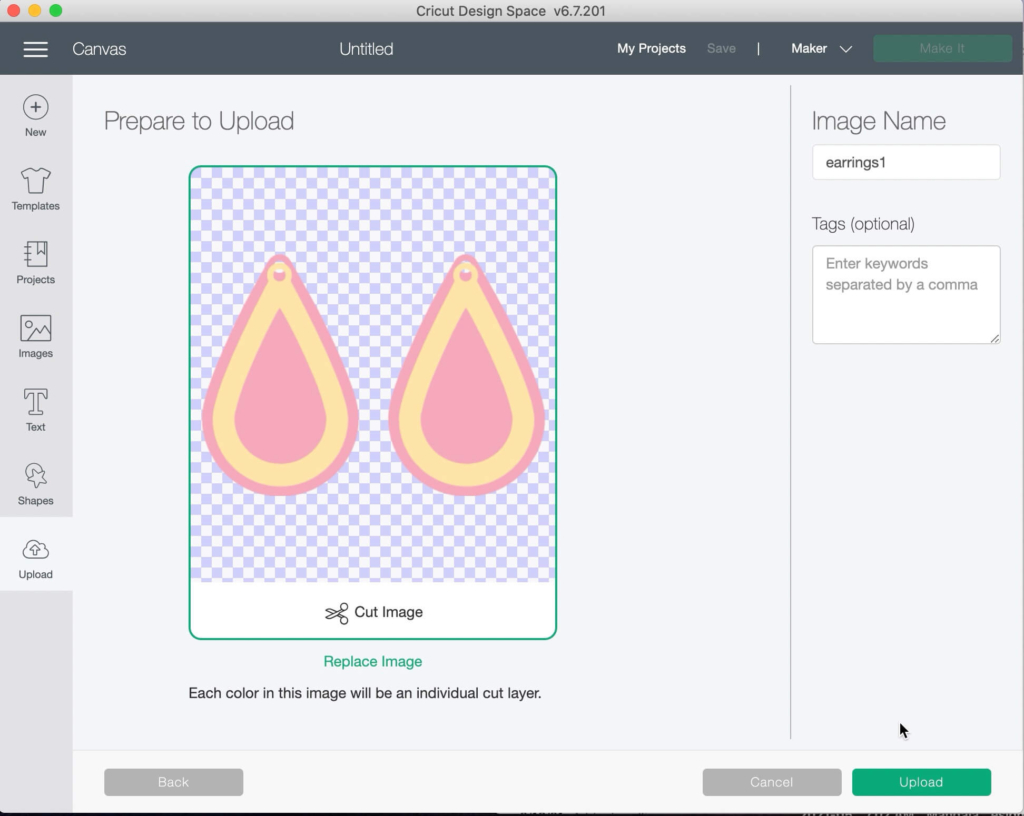
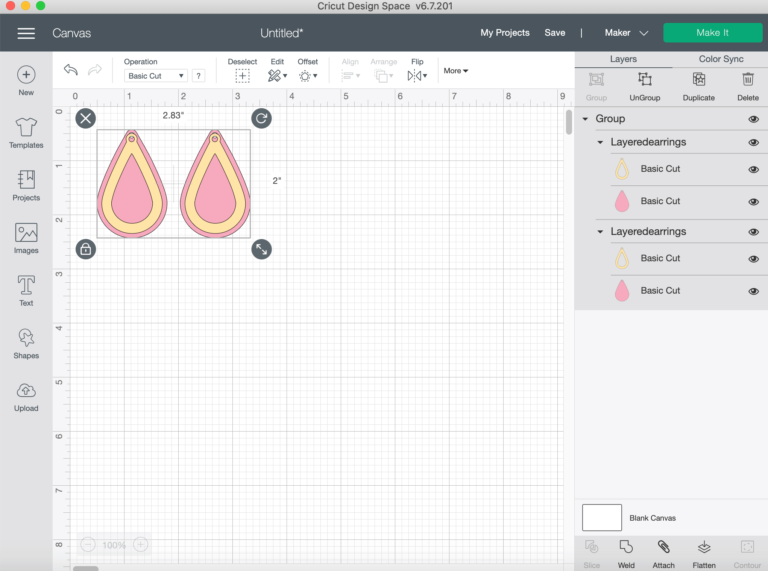
Upload the layered earrings SVG/cut file into Cricut Design Space and adjust the size is if you’d like. I sized my earrings at 2 inches in height.
Adjust the size of the earring design in design space by selecting all and using the guide to change the size. I sized my earrings at 2 inches in height.
Once your design is ready to send to the Cricut machine, grab the materials you need to cut and lets get started.
PREPARE FAUX LEATHER FOR CRICUT
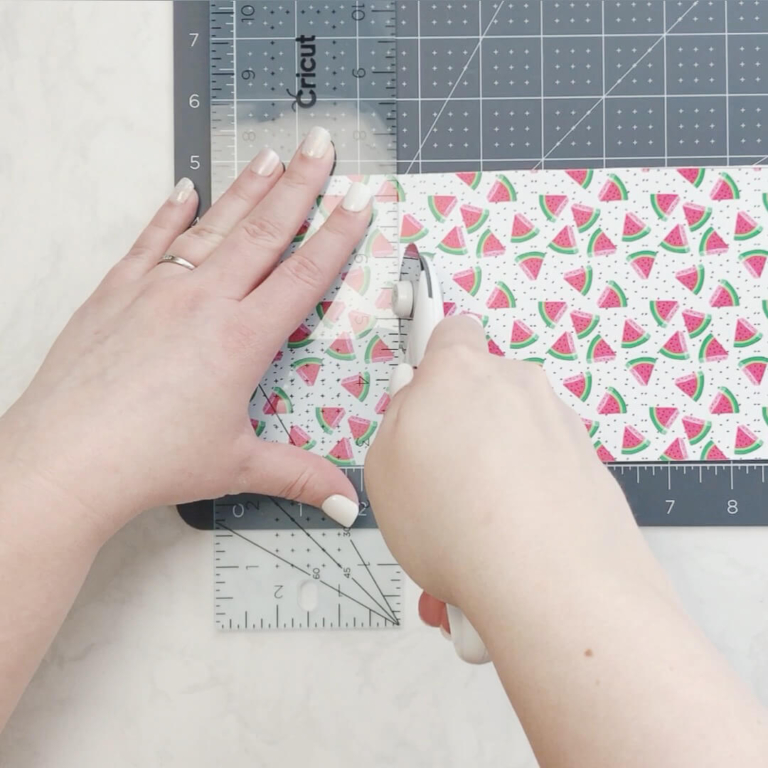
Once you send the design to the Cricut machine by clicking Make It, you will get a better idea of the size of the faux leather that you will need. Trim the faux leather to size. This will reduce the amount of transfer tape you need later and reduce the possibility of the material pulling up or shifting on the Cricut mat.
The backside of most faux leather has a soft but unfinished look. Adding iron-on (or HTV) to the back for faux leather creates a finished look without any extra weight or bulk. This is perfect for Cricut made earrings or necklace pendants that you want to maintain a delicate and light weight look. My preference is to add HTV before cutting with my Cricut machine.
The iron-on vinyl that I used for this project came from Heat Transfer Warehouse and it applied very smooth on the faux leather. The matte finish of the WALAKut Express iron-on vinyl went perfectly with the faux leather.
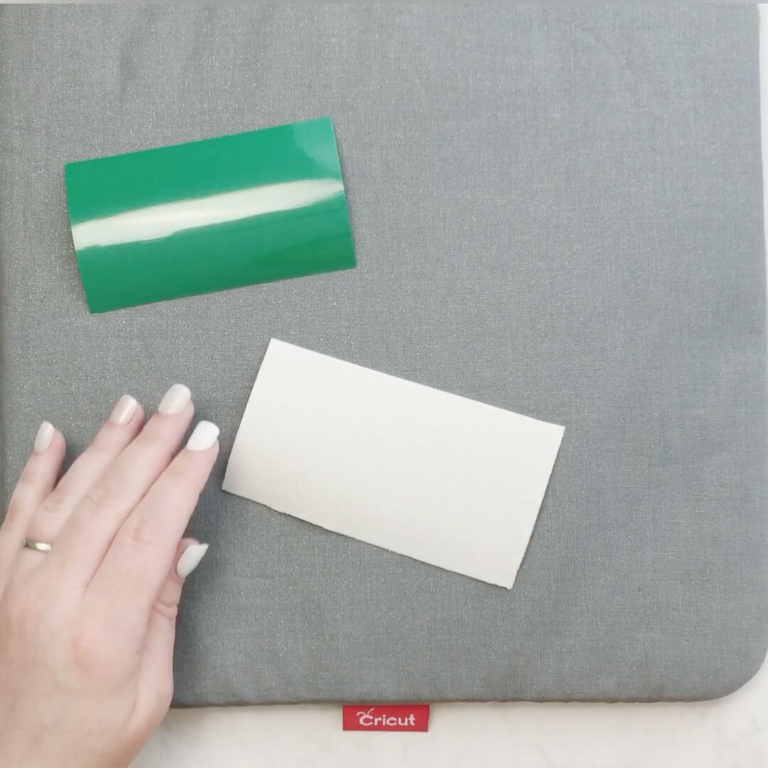
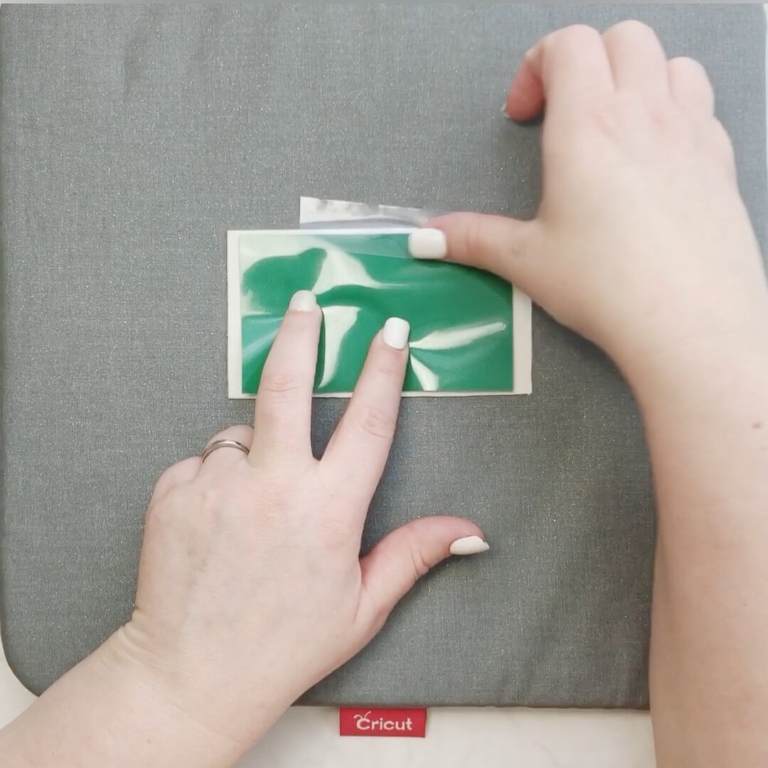
To apply HTV, use a lint roller to clean off the faux leather and use heat resistant tape or an extra piece of HTV transfer sheet to keep the HTV in place.
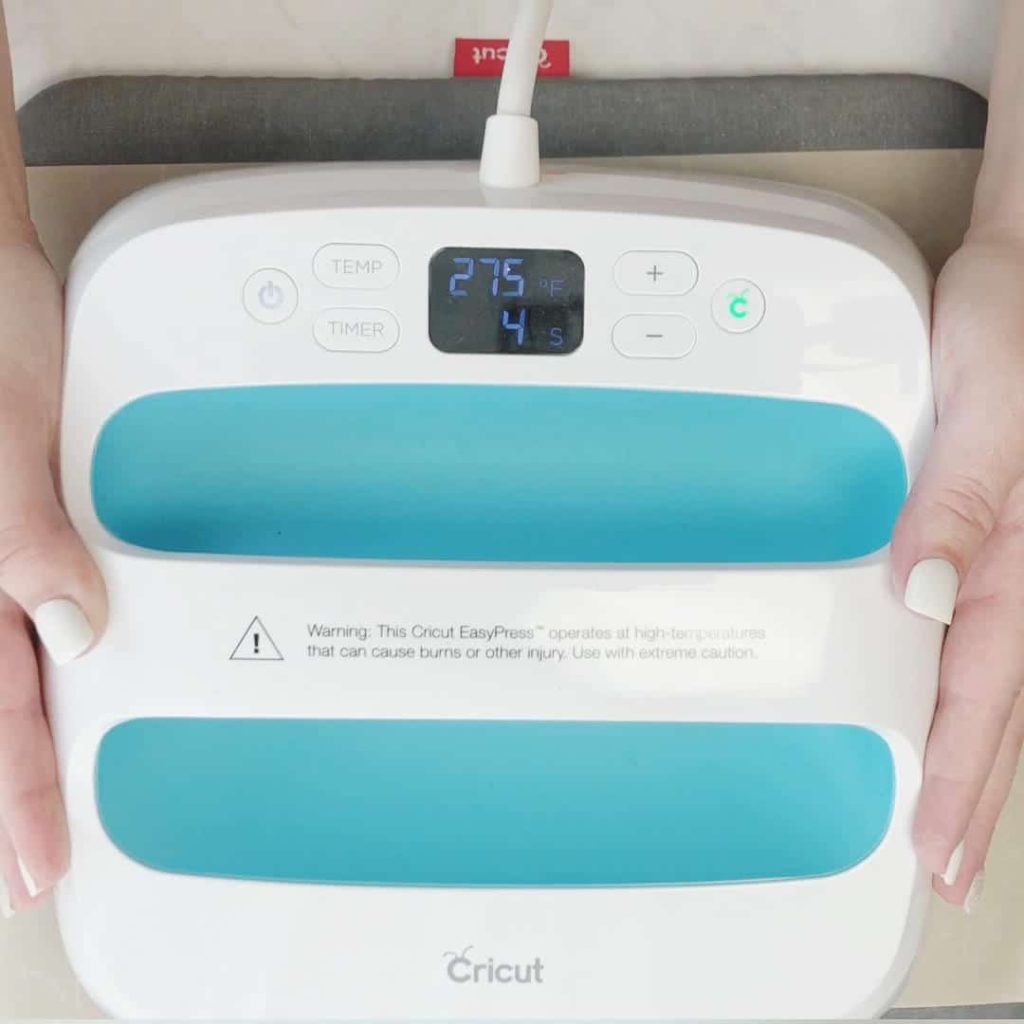
Grab your Cricut EasyPress Mat and use a Cricut EasyPress at 275 or EasyPress Mini at the lowest setting for 10 – 12 seconds. The heat settings may differ depending on the HTV used but this is a good place to start. Apply light pressure to the Cricut EasyPress to help ensure a good fuse of the HTV to the faux leather.
Make sure to use a Teflon sheet or heat resistant protective barrier (such as a previous used iron-on vinyl transfer sheet) to ensure the iron does not directly touch the faux leather. If so, the pretty pattern will likely melt and come off.
Once the HTV is applied, peel back and remove the transfer sheet while the material is warm.
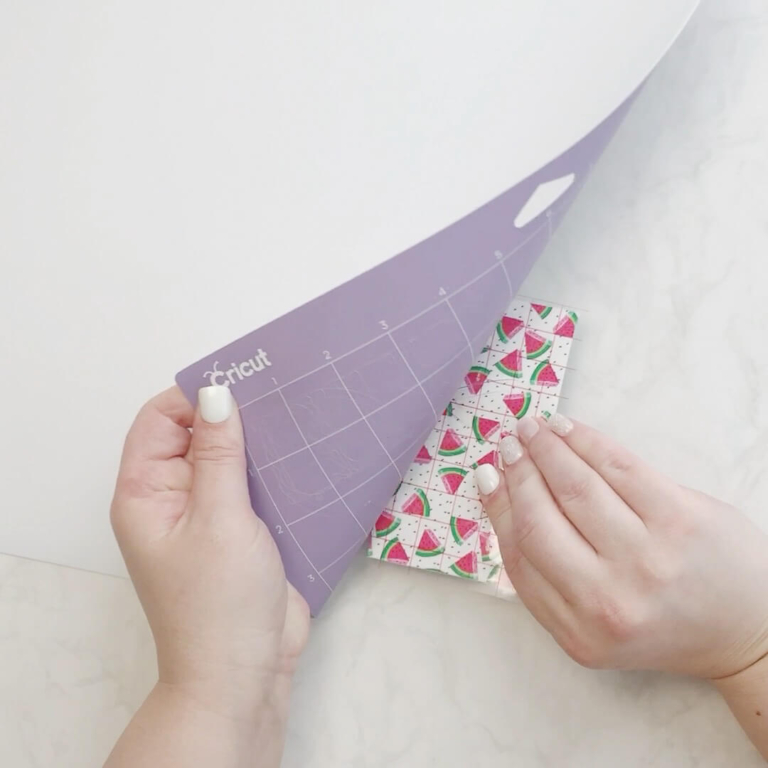
PREPARE FAUX LEATHER FOR THE CRICUT MAT
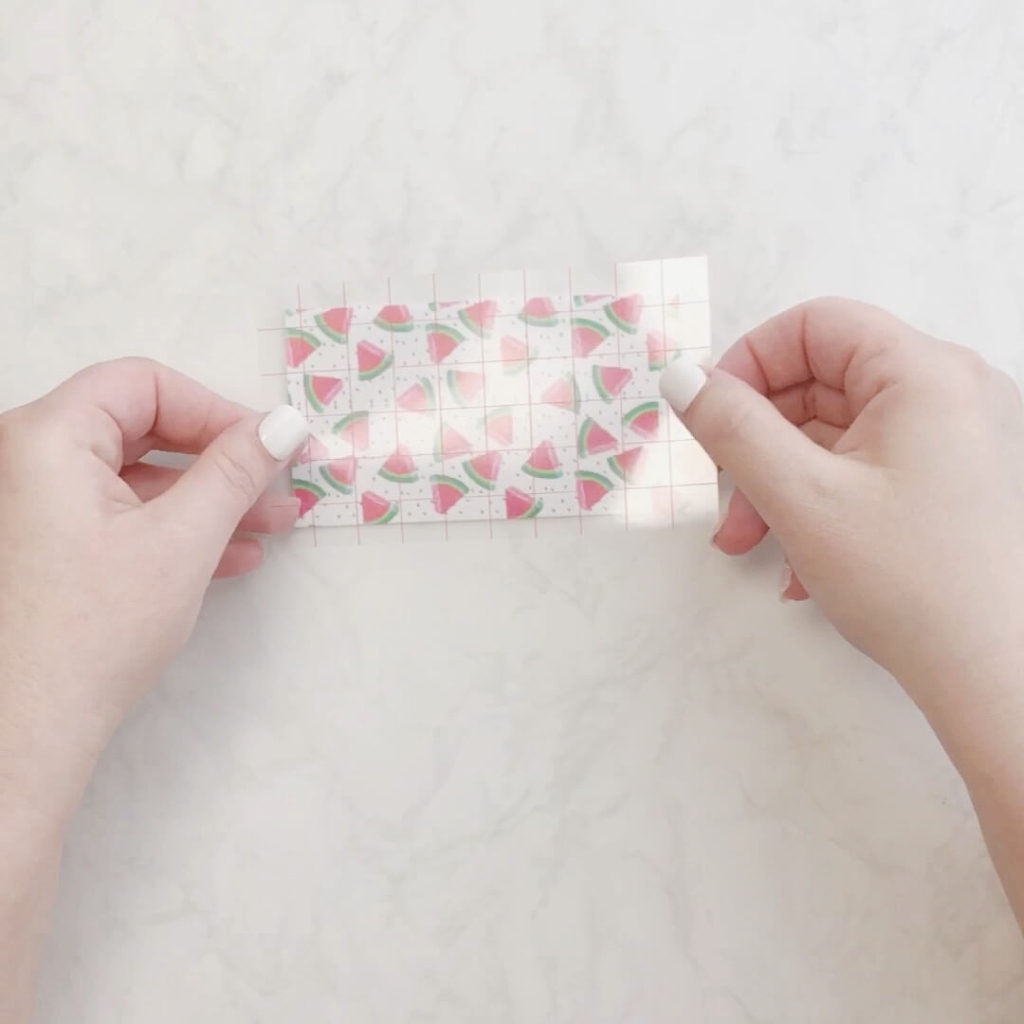
To eliminate the debris left behind on your Cricut mat by the leather, use transfer tape as a barrier between the faux leather and the Cricut mat.
Apply standard transfer tape to the pretty side of the faux leather. I have tried both Cricut StrongGrip and standard transfer and either transfer tape will work for faux leather.
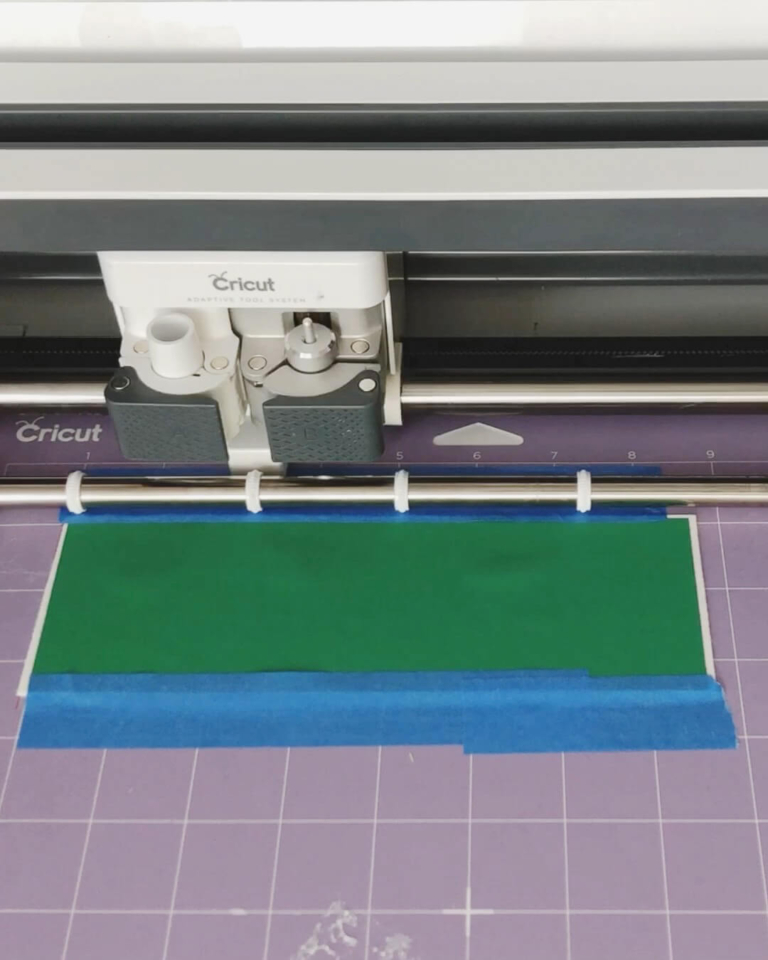
Apply the faux leather face down to a StrongGrip Cricut mat and add painters’ tape to further secure the leather.

CUTTING FAUX LEATHER WITH CRICUT
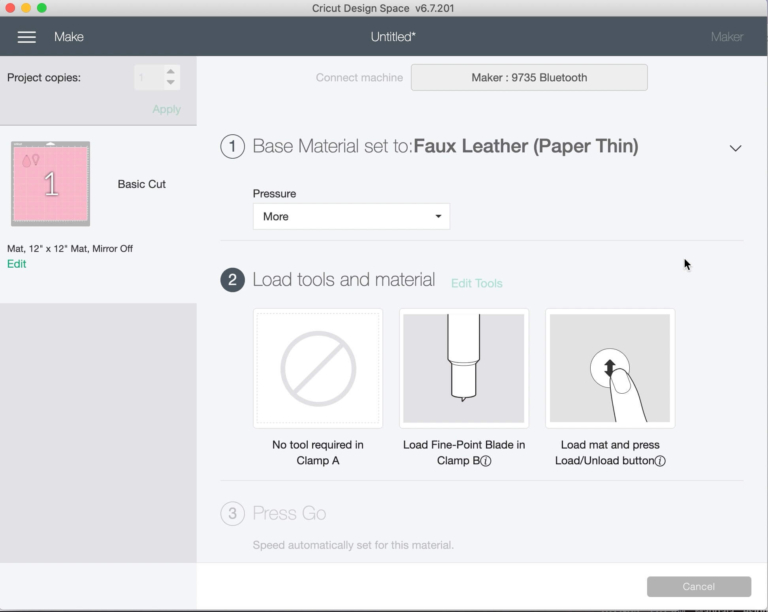
Faux leather can be successfully cut on all Cricut cutting machines, including the Cricut Joy, with the standard fine point blade. For the Cricut Explore Air 2 or Cricut Maker with the material setting of Faux Leather (Paper Thin).
Browse all materials for Faux Leather (paper thin) as the cut setting, select More Pressure and use the standard fine point blade. This cut setting will have the Cricut machine go multiple passes over the Faux Leather.
If using a Cricut Explore Air 2, turn the Smart Set Dial to Custom.
For the Cricut Joy, this post reviews cutting faux leather on the Cricut Joy. Faux Leather is on the list of materials for the Cricut Joy.
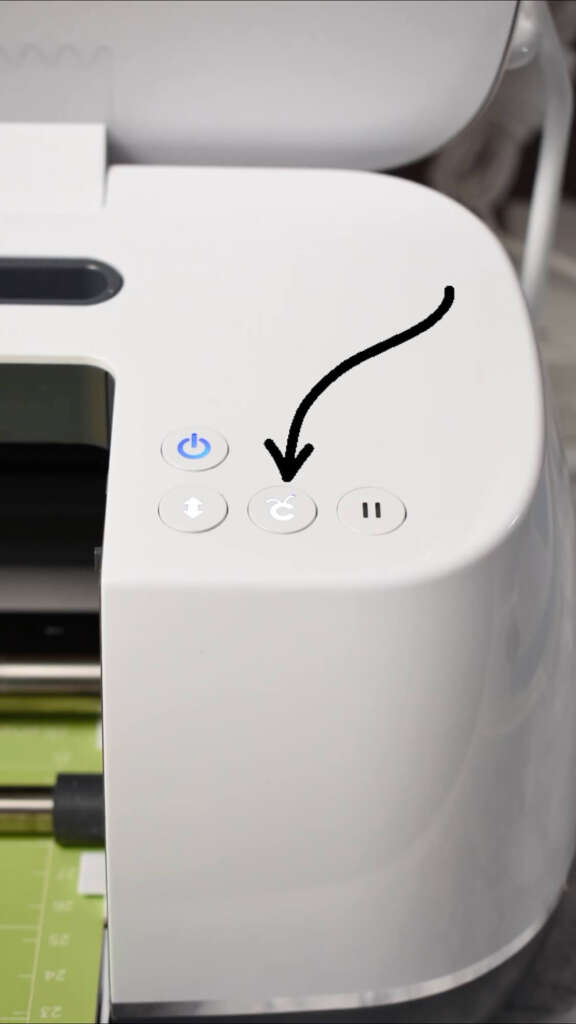
When cutting faux leather with HTV, I use the material setting Faux leather (Paper Thin) with More pressure. Additionally, I check my cut before unloading the mat and press the C button on my Cricut machine for a second cut. The second cut really helps.
The cut settings may depend on the type of HTV used. For example, super thick glitter iron-on, may even require the deep point blade for a successful cut. So far, I’ve used a standard iron-on vinyl with no extra texture for my faux leather Cricut projects.
HOW TO ASSEMBLE CRICUT MADE FAUX LEATHER EARRINGS
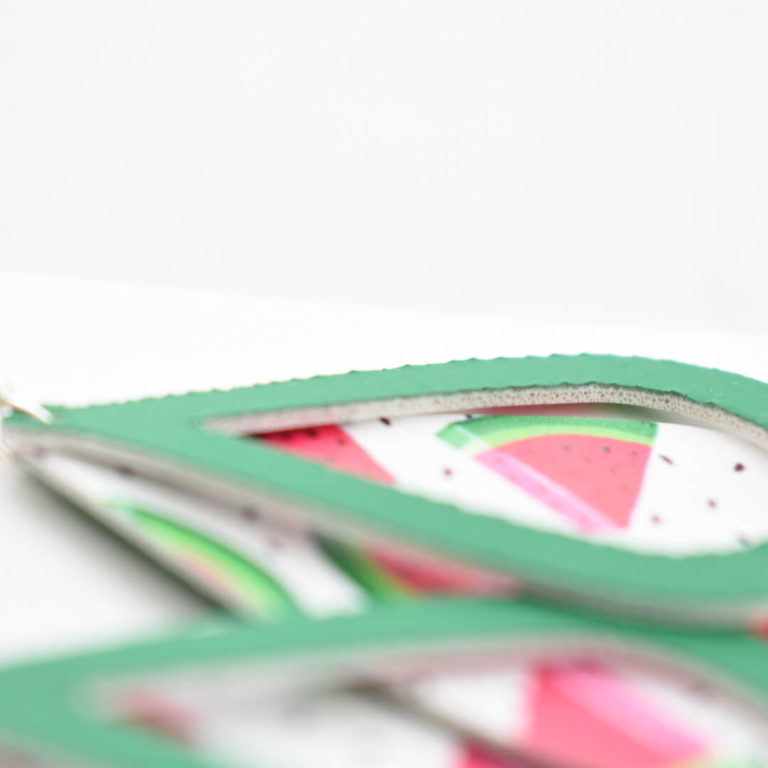
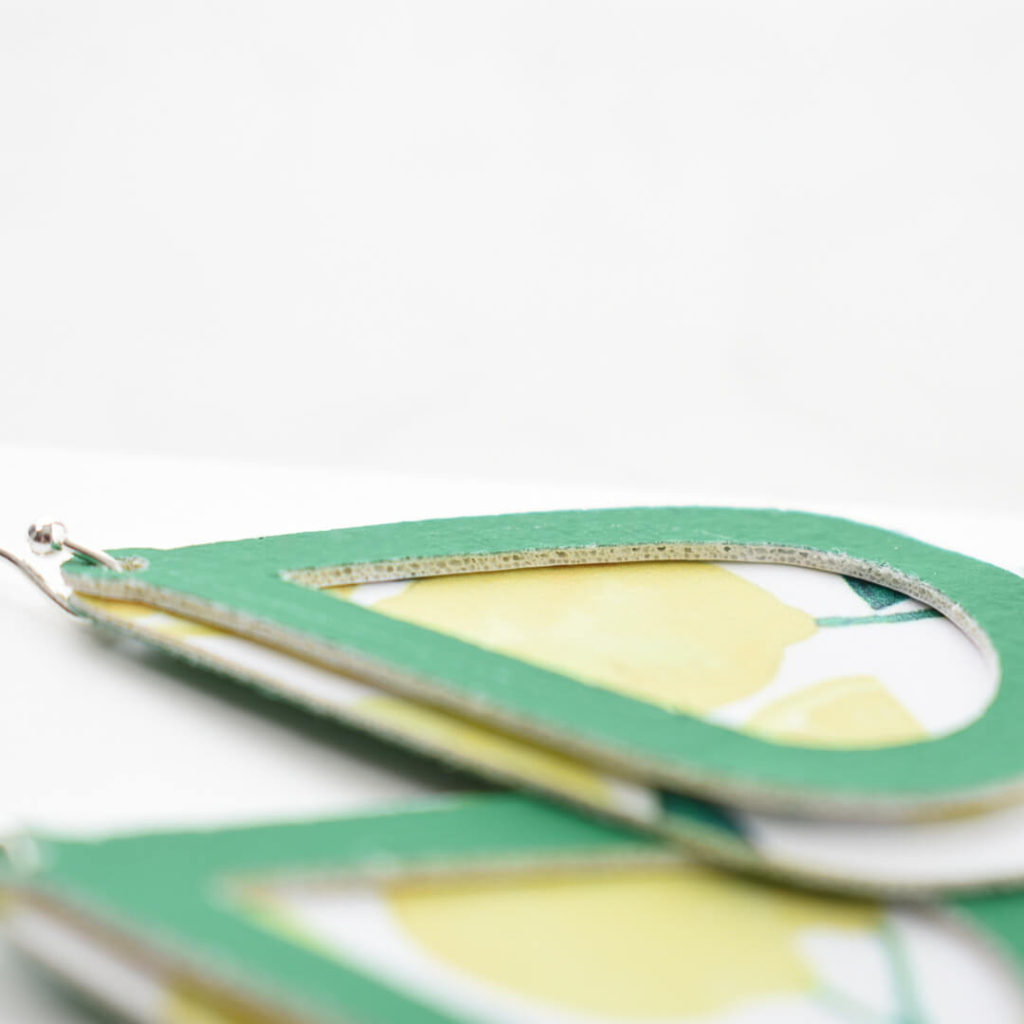
Once your Cricut machine cuts are complete, remove the leather from the Cricut mat much like you would with a cardstock cut. Try not to pull and stretch out the faux leather.
Remove any remaining transfer tape left on the faux leather.

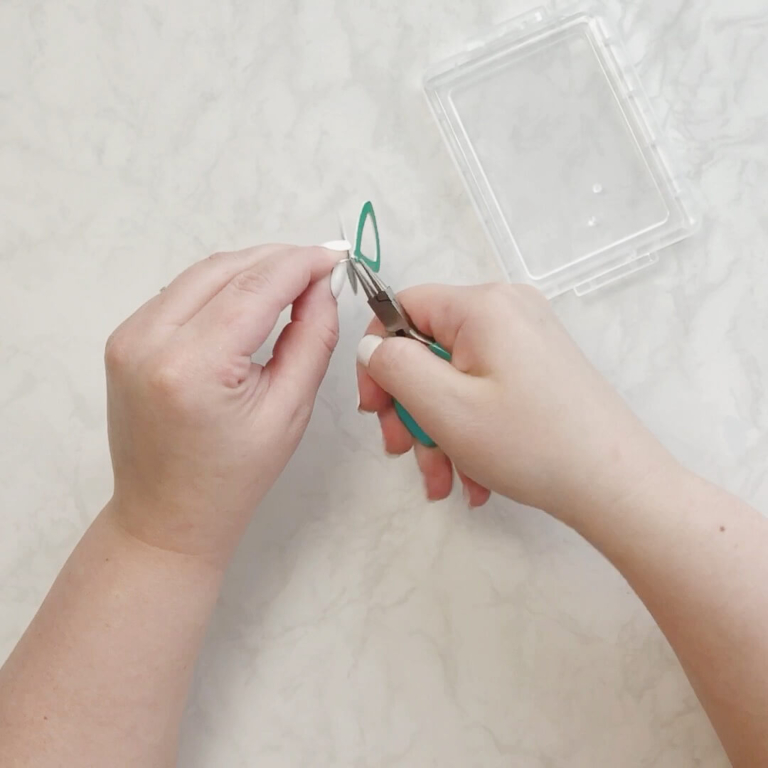
The hard part is complete, with simple earring hooks the assembly is very easy.
One tip before you add the jewelry hardware, check the edges of the earrings on the HTV side. If there are any rough or jagged looking edges, apply heat for another 10 seconds to smooth out the edges and ensure the edges are secure.
The final task is to add the faux leather earrings to earring hooks and use jewelry tools or a needle nose piler to close the loops.
CHECK OUT MY OTHER CRICUT LEATHER TUTORIALS
- Magnetic faux leather bookmarks
- Faux Leather MOM Photo keychain
- Leather bow keychain
- Leather bow charm
WAS THIS TUTORIAL HELPFUL?
Did you find this tutorial how to make a faux leather earrings with Cricut helpful? If so, please pin this idea and let me know your thoughts in the comments below!

4 Comments
Thanks for such concise instructions. I just made my first pair and they turned out perfect!
How exciting! So glad you found this tutorial helpful Jill.